
Microwave Not Heating But Running: 5 Causes & Fix Guide (2026)
It is an incredibly frustrating scenario. You place your plate inside, press start, the interior light comes on, the glass turntable spins, and the exhaust fan hums normally. The appliance sounds exactly as it always does. But when the timer finally beeps, your food is stone cold.
The microwave not heating but running problem is one of the most common—and deceptive—appliance failures. While a loud, aggressive issue like a Microwave Sparking Inside is visually terrifying and obvious, a microwave that simply refuses to produce heat is a silent indicator of a highly specific internal component failure.
To understand why this happens, you need to know how these machines are wired. Below is a complete troubleshooting guide to the 5 most common causes of a microwave running without heating, and exactly what it takes to diagnose and fix them.
The Quick Answer
Microwaves operate on a “split” electrical system. The lights, timer, and turntable run on a standard low-voltage circuit, while the heating components rely on a dangerous high-voltage circuit. If your microwave runs but doesn’t heat, the high-voltage side has failed. The 5 most common causes are a broken door interlock switch, a blown thermal fuse, a shorted high-voltage diode, a failed magnetron, or a dead high-voltage capacitor. Door switches and fuses are cheap DIY fixes; magnetrons and capacitors require professional, potentially expensive repairs.
1. Broken Door Switch (Interlock Switch)
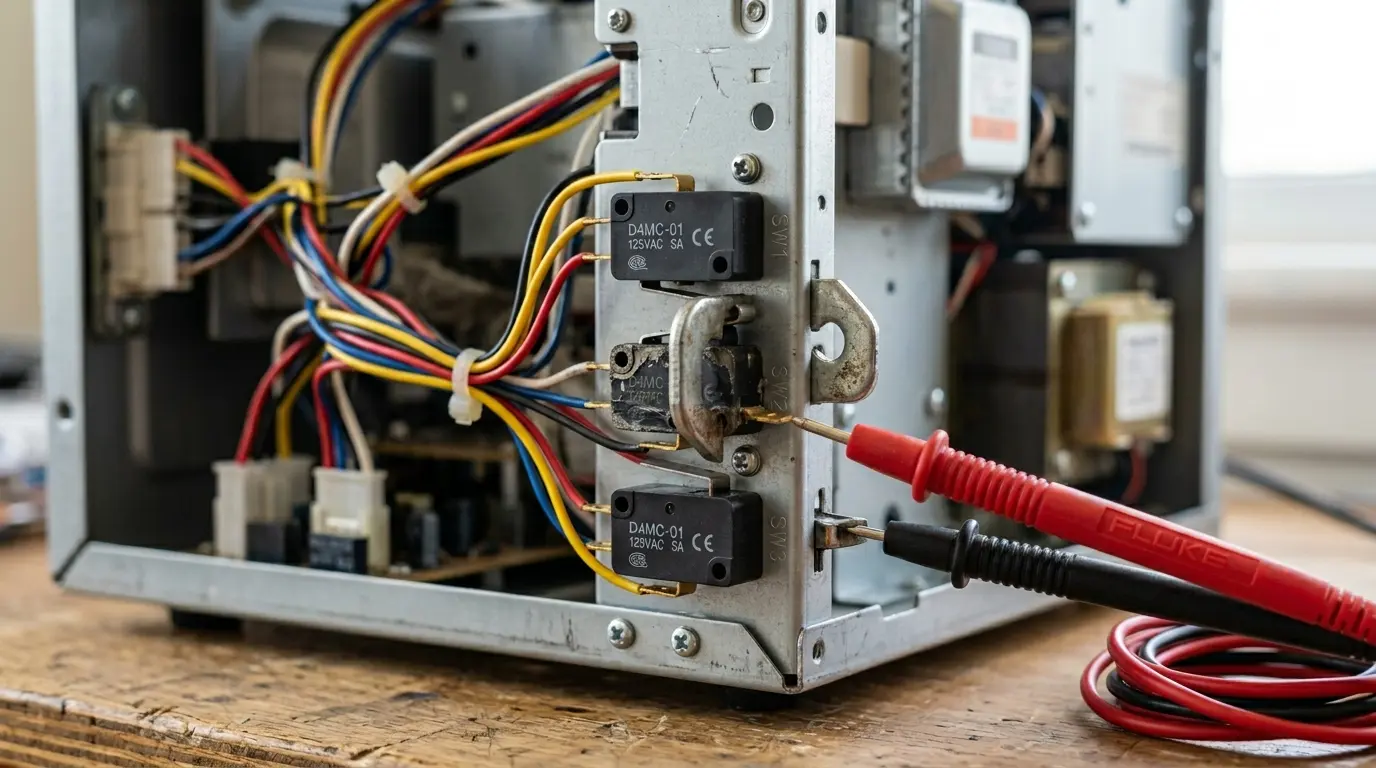
Microwaves are built with three or four mandatory safety door switches (also known in the industry as interlock switches). Their primary, critical job is to ensure the appliance absolutely cannot produce harmful microwave radiation while the door is open.
The Problem: Mechanical Wear and Tear
When you close the door, a series of plastic hooks or latches engage these switches in a highly specific sequence. Over years of slamming the door shut, the plastic latch can wear down, or the internal spring mechanism of the microswitch can simply give out. Because the switches control different circuits, it is highly common for the switch controlling the internal light and turntable to remain perfectly functional, while the specific switch controlling the magnetron fails. The result? The microwave runs, but the heating circuit is never authorized to turn on.
The Fix: Continuity Testing
This is one of the most common and cheapest repairs you can perform.
- Unplug the microwave and remove the outer metal cabinet to expose the control board.
- Locate the door switches (usually stacked vertically behind the control panel near the latch assembly).
- Remove the wires attached to the terminals of the suspect switch.
- Using a multimeter set to Ohms (or Continuity mode), touch the probes to the terminals. When you physically press the small actuator button on the switch, the multimeter should beep or drop to zero ohms.
- If a switch lacks continuity when the button is pressed, it is dead and must be replaced. Replacement switches are universal and usually cost under $15.
2. Blown High-Voltage Diode
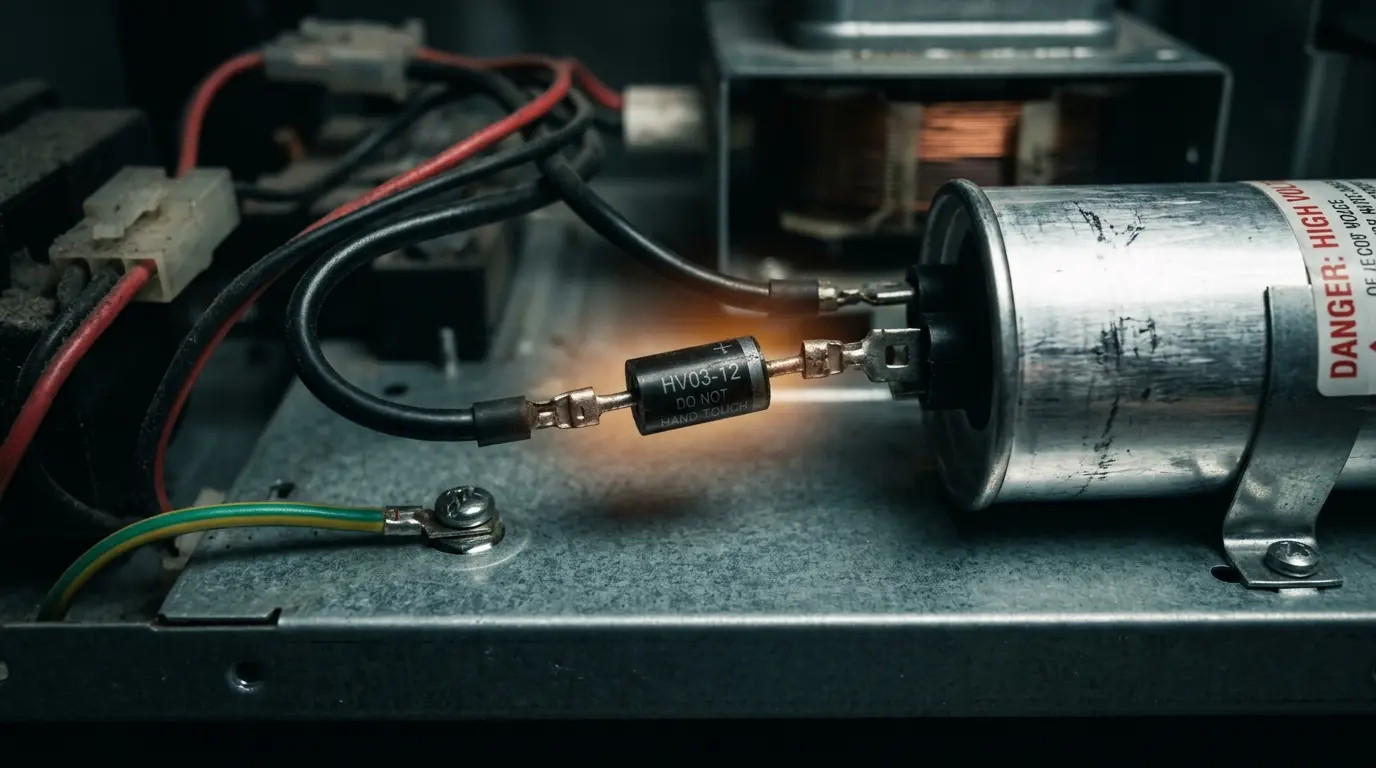
The high-voltage diode is a crucial electrical component that acts as a one-way valve for electricity. It works directly alongside the capacitor to double the incoming electrical voltage (converting standard 120V AC into nearly 5,000V DC), providing the massive surge of raw power needed by the magnetron to cook your food.
The Problem: Electrical Burnout
Diodes undergo immense electrical and thermal stress every single time you press start. If your home experiences a power surge, or simply due to age and repetitive use, the diode can burn out or short circuit. When the diode fails, the magnetron receives zero power. Because the low-voltage components (the digital display and turntable motor) are entirely unaffected, you are left with a microwave not heating but running perfectly on the outside.
The Fix: The 9V Battery Test
Warning: This involves high-voltage areas. You must safely discharge the high-voltage capacitor before touching the diode (see Section 4 for safety warnings).
Testing a high-voltage diode is tricky because standard multimeters do not output enough voltage to properly bias (activate) it. To test it, you must place a 9V battery in series with the diode and your multimeter.
- If the multimeter reads around 5 to 6 volts in one direction, and 0 volts when you reverse the diode, it is working perfectly.
- If it reads 0 volts in both directions, or if the diode shows visible burn marks, bubbling, or physical cracking on its casing, it has failed and must be replaced.
3. Failed Magnetron
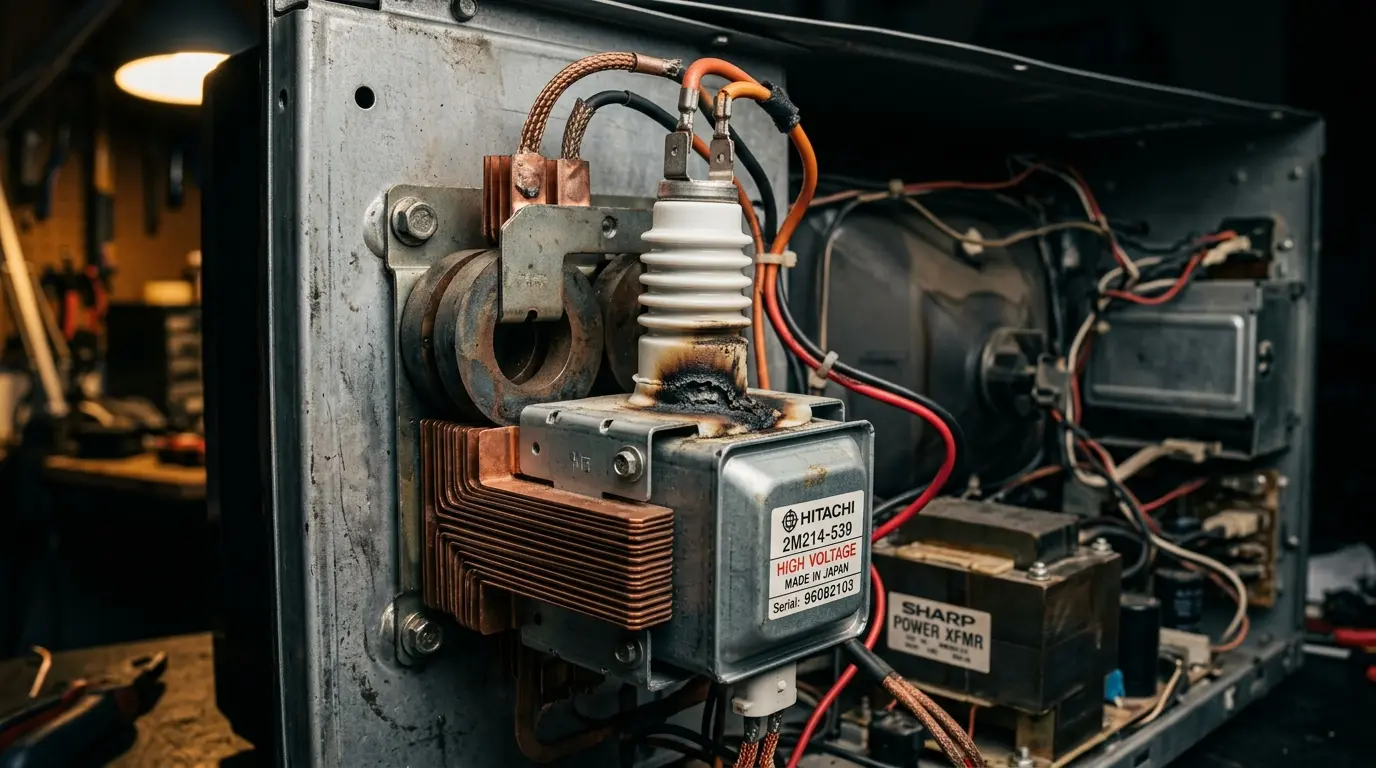
The magnetron is the literal heart of the appliance. It is a highly specialized, heavy vacuum tube component that takes the high voltage generated by the diode and capacitor and converts it into the exact microwave radio frequency (2.45 GHz) responsible for vibrating water molecules and heating your food.
The Problem: End of Lifespan
Magnetrons do not last forever. They are consumable parts that degrade over thousands of cooking cycles. They can burn out from natural age, severe power grid surges, or from operator error—such as accidentally running the microwave completely empty, which forces the radiation to bounce back into the magnetron and melt its internal antenna.
If the magnetron is dead, the microwave is essentially just an expensive, spinning light box.
The Fix: Total Replacement
Magnetrons cannot be repaired; they must be entirely replaced. Furthermore, they are the most expensive component in the machine. If you are using an older or budget-friendly model, replacing an OEM magnetron (plus labor) often costs significantly more than the appliance is actually worth.
If you find yourself in this situation, we highly recommend browsing our Panasonic vs Toshiba Microwave guide to find a reliable, modern replacement rather than sinking money into a dying unit.
4. Burned Out High-Voltage Capacitor
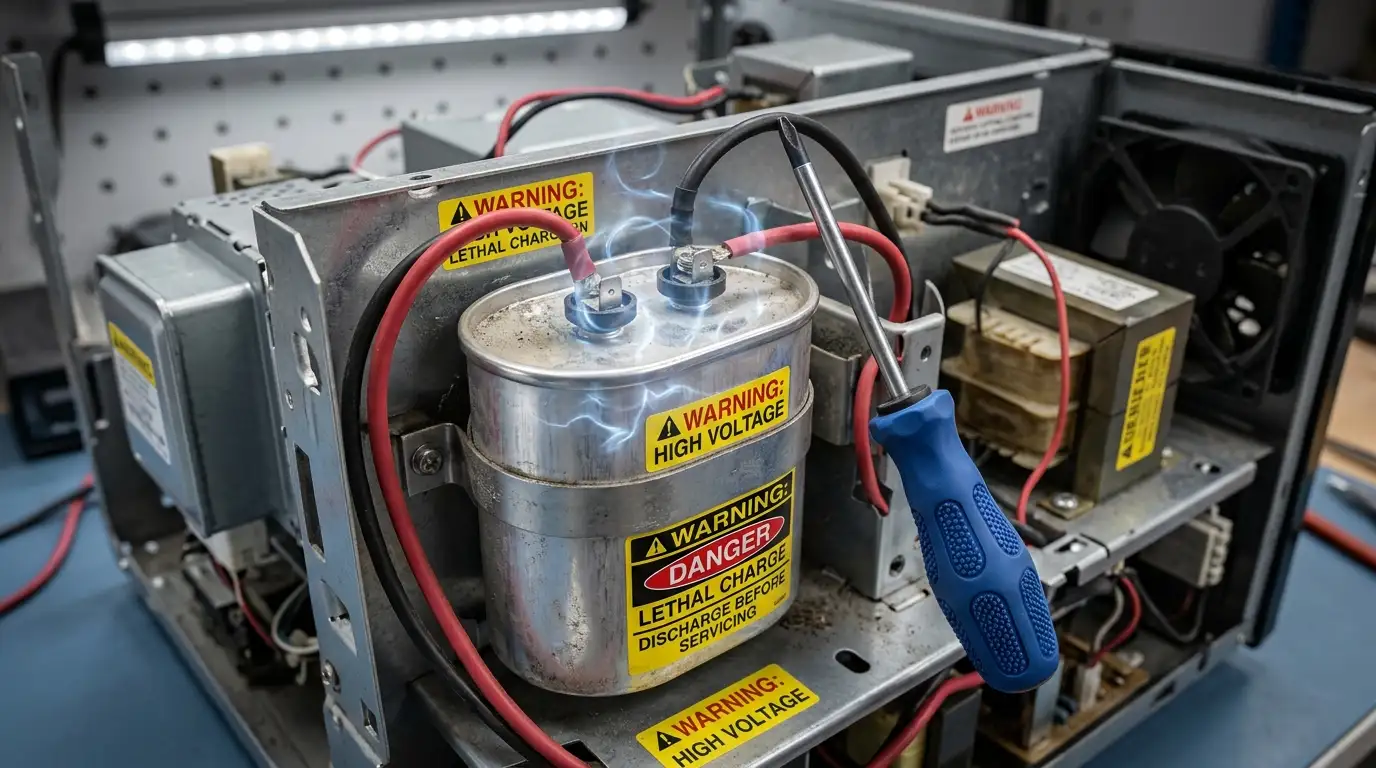
The high-voltage capacitor acts as a temporary battery, storing massive amounts of electricity and working with the diode to push a continuous, high-voltage current into the magnetron.
If the capacitor fails or leaks its internal dielectric fluid, the entire high-voltage circuit is broken. The magnetron starves for power, and your food remains completely cold despite the timer counting down normally.
LETHAL VOLTAGE WARNING
This is the most dangerous component in any household appliance. Testing a capacitor requires a specialized VOM meter equipped with a capacitance testing function.
The capacitor can hold a lethal electrical charge (thousands of volts) for days or even weeks after the microwave has been unplugged from the wall.
It must be discharged manually with a highly insulated tool (typically a screwdriver with a high-wattage resistor) by a trained professional before any internal testing, touching, or repair is attempted. Do not attempt this if you are a novice DIYer.
5. Thermal Fuse or Protector Tripped
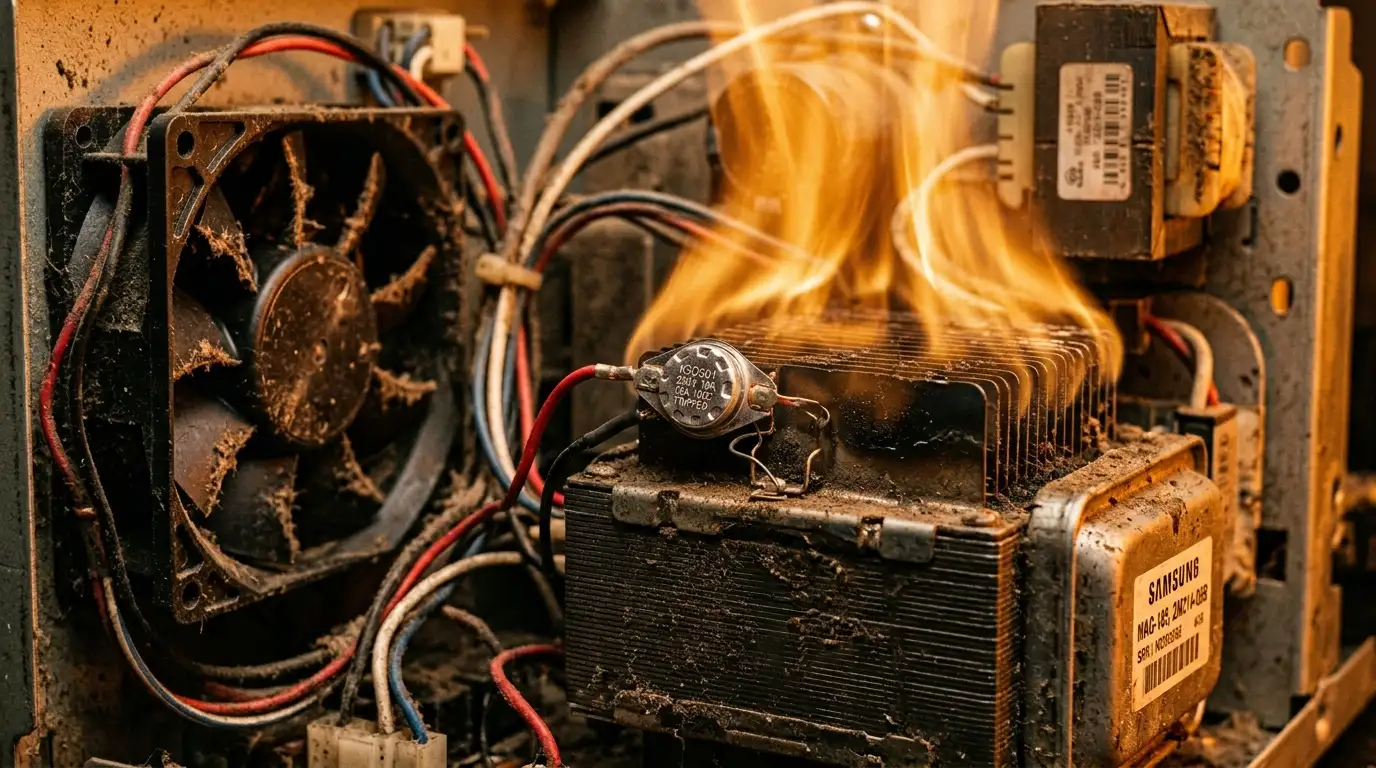
Microwaves generate an incredible amount of heat internally. To prevent the appliance from melting its own components or catching your kitchen cabinets on fire, microwaves are equipped with several thermal fuses or bimetallic thermal cut-outs.
The Problem: Poor Airflow
If the internal exhaust fan fails, the cooling vents get blocked by heavy grease and dust, or the microwave is run continuously for too long (like trying to boil a massive pot of water for 40 minutes), the internal temperature will spike. The thermal fuse will “trip” (blow) to immediately cut power to the heat-generating magnetron. On many modern models, this safety trip leaves the low-voltage control board and turntable running normally, creating the illusion of a working appliance.
The Fix: Continuity and Cleaning
Unplug the unit, locate the thermal fuses (usually resting directly on top of the magnetron housing or mounted to the exterior of the heating cavity), and test them for continuity with a multimeter. If one has no continuity, it has blown and must be replaced.
However, while replacing the fuse is incredibly cheap, you must figure out why the microwave overheated in the first place (e.g., cleaning the greasy filters on an Over-The-Range unit), or the brand new fuse will immediately blow again during your next meal.
Explore More Appliance Diagnostics
Don’t stop here! Visit our complete hub for more expert troubleshooting tips, safety guides, and updated buying recommendations for 2026.
FAQ: Microwave Running But Not Heating
2026 Guide: Troubleshooting and Fixes
Safety Warning: Always unplug your microwave and let it sit for at least 24 hours before attempting any internal diagnostics or repairs.
