
Stop Puncturing Bags: How to Vacuum Seal Bone-In Meat Perfectly (2026 Guide)
You just spent a premium at the butcher shop for a massive, beautifully marbled Tomahawk ribeye, or perhaps you just finished processing a successful deer harvest. You carefully slide the meat into a vacuum bag, lock the machine, and watch as the plastic tightly shrink-wraps around the protein. It looks perfect.
But when you pull that same bag out of the deep freeze three months later, it is loose, filled with air, and the meat is covered in destructive, grayish freezer burn. What happened? A micro-puncture.
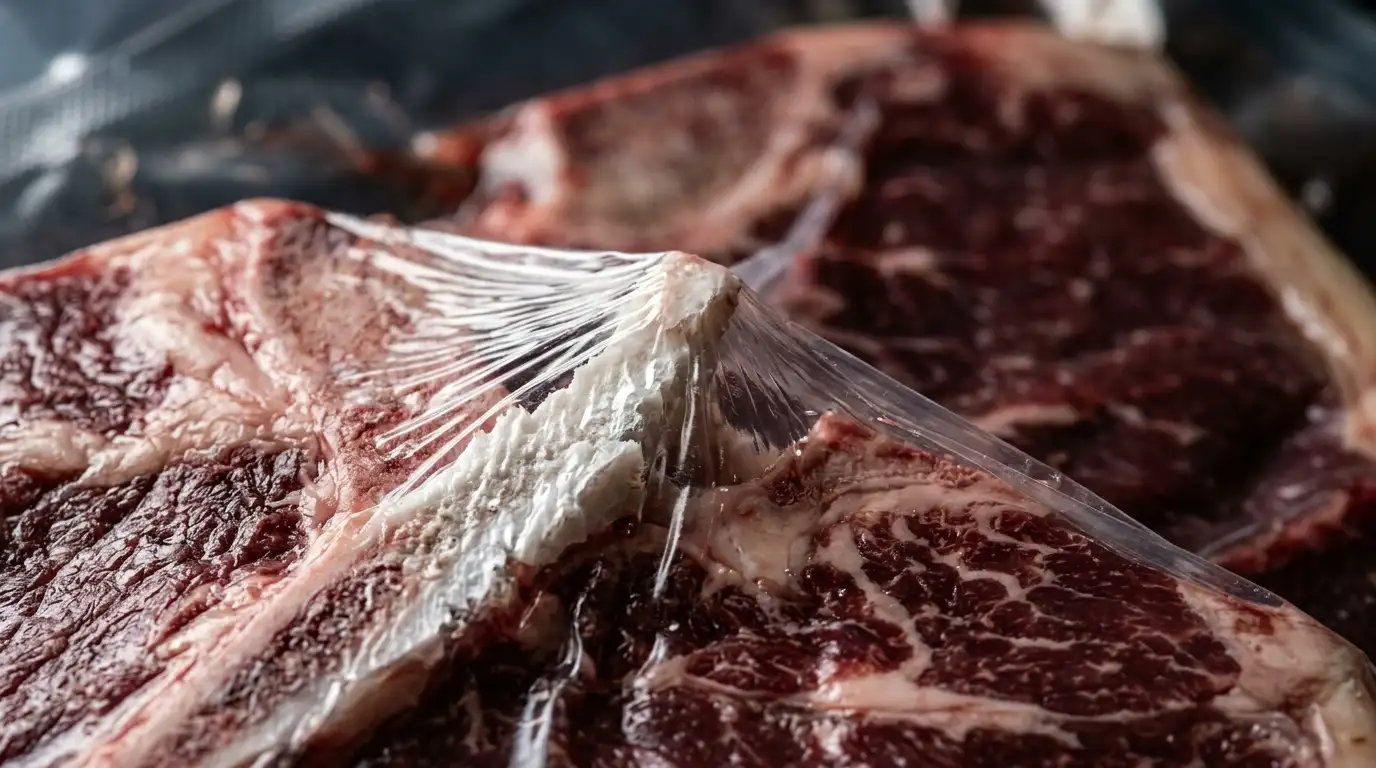
When sealing bone-in cuts—like T-bone steaks, pork chops, bone-in chicken breasts, or ribs—the intense atmospheric pressure of a vacuum sealer pulls the plastic aggressively tight against the sharp, jagged edges of the calcium bone. Either instantly, or slowly over time in the freezer, the bone pierces the plastic, breaking the seal and letting oxygen rush back in.
If you are tired of wasting expensive bags and ruining premium cuts of meat, you need to change your prep strategy. In this guide, we break down exactly how to vacuum seal bone-in meat perfectly using professional butcher techniques and everyday kitchen hacks.
The Quick Answer
You cannot vacuum seal sharp, bone-in meat in a standard plastic bag without adding a physical buffer. The intense suction pressure will eventually pull the plastic taught enough to pierce it against the bone. To guarantee a perfect, long-term seal, you must cover the sharp edges of the bone with a protective shield. Professional butchers use a heavy-duty, puncture-resistant Bone Guard Tape. For a free DIY hack, you can simply use a thickly folded paper towel, an unsealed inner Ziploc bag, or upgrade to heavy-duty, industrial 5-mil thick vacuum bags.
For our complete library on meat preservation and machine reviews, explore our master directory: The Ultimate Vacuum Sealing Hub: Food Storage, Sous Vide, Mason Jars & Buying Guides (2026).
I. The Physics of the Puncture (Why Standard Bags Fail)
To stop the leaks, you must deeply understand exactly how your machine interacts with the physical structure of the food. When a vacuum sealer (whether it is an external suction machine or a massive commercial chamber sealer) evacuates the air from a bag, it doesn’t just make the bag physically smaller; it creates an intense state of negative pressure.
The outside atmosphere of your kitchen pushes inward on the bag with immense, crushing force (often exceeding 25 inches of mercury, or inHg), stretching the nylon plastic film violently tight over every single microscopic contour of the food inside.
The Balloon and the Needle
While the muscle and fat on a steak are soft and yielding, a cut bone (especially one that was aggressively severed using a butcher’s bone saw) is completely rigid and incredibly sharp, often featuring jagged edges that act exactly like a serrated saw blade.
Standard, consumer-grade vacuum sealer bags are typically manufactured from 3-mil thick plastic. Under intense vacuum pressure, a 3-mil sheet of plastic stretched tightly over a sharp, jagged bone edge acts exactly like an inflated rubber balloon pressed firmly against a steel needle. The tension is too great. The plastic will inevitably snap and puncture.
The “Delayed” Freeze Puncture
Sometimes the bag survives the initial sealing process flawlessly on your kitchen counter, only to fail months later. Why? Because chest freezers are chaotic environments. If you stack bags of meat, or rummage through the frozen blocks to find something at the bottom, the rigid, frozen packages scrape against each other. This microscopic physical friction is enough to push a taught, frozen plastic bag right through the tip of a hidden bone.
II. The Professional Fix: Bone Guard Tape
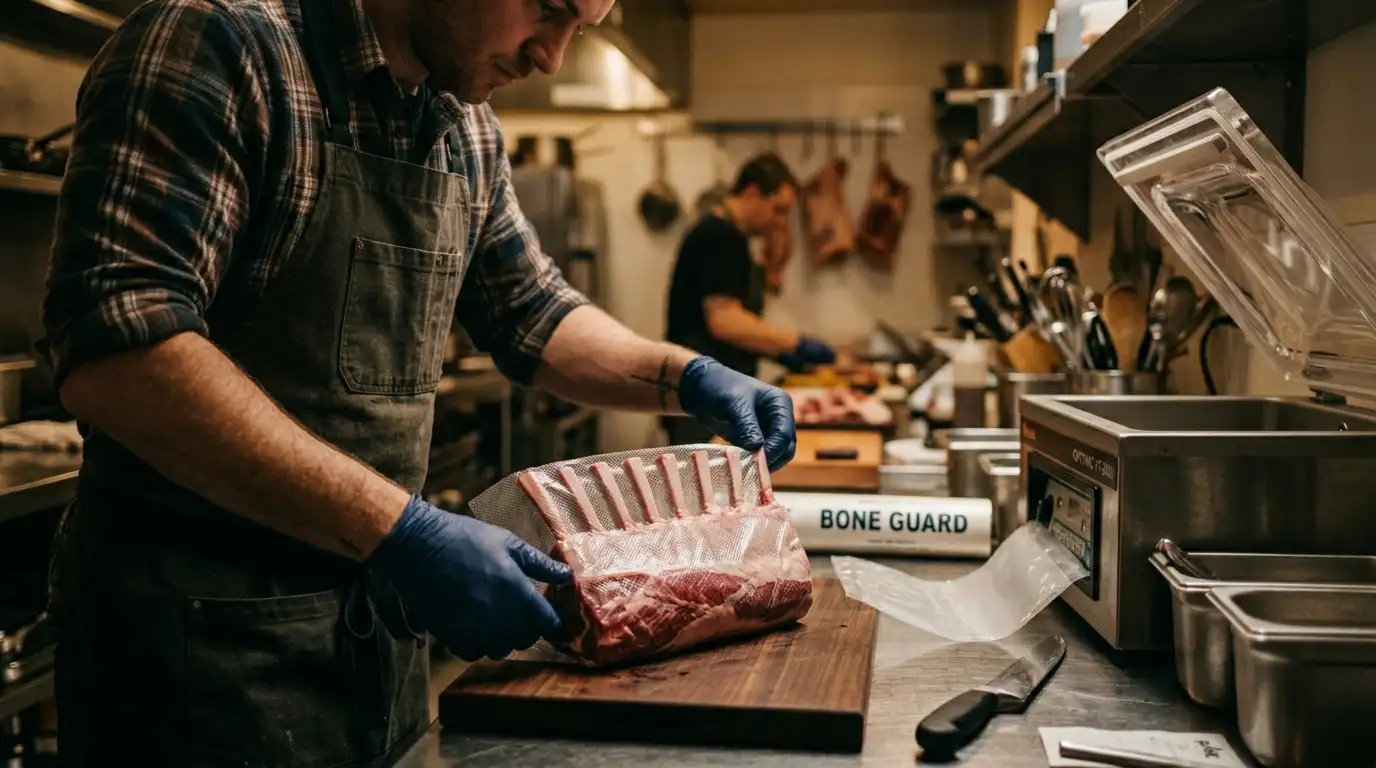
If you process large volumes of meat, hunt big game like elk or moose, or frequently buy massive, bone-in subprimals from wholesale clubs to break down at home, you cannot rely on DIY hacks. You need the exact same specialized tool that professional, commercial butchers use: Bone Guard.
Bone guard is a heavy-duty, highly puncture-resistant material sold in continuous rolls or pre-cut sheets. It is most commonly made from thick, waxed canvas, high-density polyethylene, or specialized clear wax-coated fabric that is 100% food safe.
It is incredibly simple. You use scissors to cut a small square of the bone guard material off the roll. You then manually fold it directly over the sharp, exposed tip of the bone before placing the entire cut of meat into the vacuum bag.
It acts as a bulletproof Kevlar shield. The heavy bone guard absorbs the sharp, jagged point of the bone, presenting a perfectly smooth, flat, impenetrable surface to the delicate vacuum sealer bag. It is the absolute best way to guarantee a permanent seal.
To find the exact commercial brands that perform best in the deep freeze without leaving a waxy residue on your steaks, explore our curated list: Best Heavy-Duty Bone Guard Tape for Vacuum Sealing Meat.
III. The Free Fix: The Paper Towel Hack

If it is 10:00 PM on a Sunday, you are trying to meal-prep for the week, and you obviously don’t have a commercial roll of bone guard tape sitting in your pantry, do not panic. You can achieve the exact same mechanical result using an item you already own: a standard paper towel.
- The Technique: Take a clean, dry, heavy-duty paper towel (avoid incredibly cheap, single-ply towels) and fold it onto itself three or four times until you have created a thick, dense, multi-layered square.
- The Placement: Place the densely folded paper towel directly over the sharp point of the bone. (Pro Tip: Because dry paper towels easily slide out of place, use a tiny drop of tap water on the towel to act as an adhesive, helping the paper stick firmly to the bone while you slide the entire cut of meat down into the vacuum bag).
- The Result: The dense layers of the paper towel act exactly like a shock absorber or a cushion. When the machine engages the vacuum and pulls the bag tight, the sharp bone harmlessly crushes into the soft paper towel instead of piercing the plastic film.
Bonus Utility: Paper towels are actually the absolute ultimate secret weapon for home vacuum sealing. Beyond protecting against bones, they are mandatory for absorbing marinades and meat juices to protect your machine’s heating element. We cover this liquid-absorption technique deeply in Vacuum Sealer Not Sealing Wet Foods? Here’s the Fix.
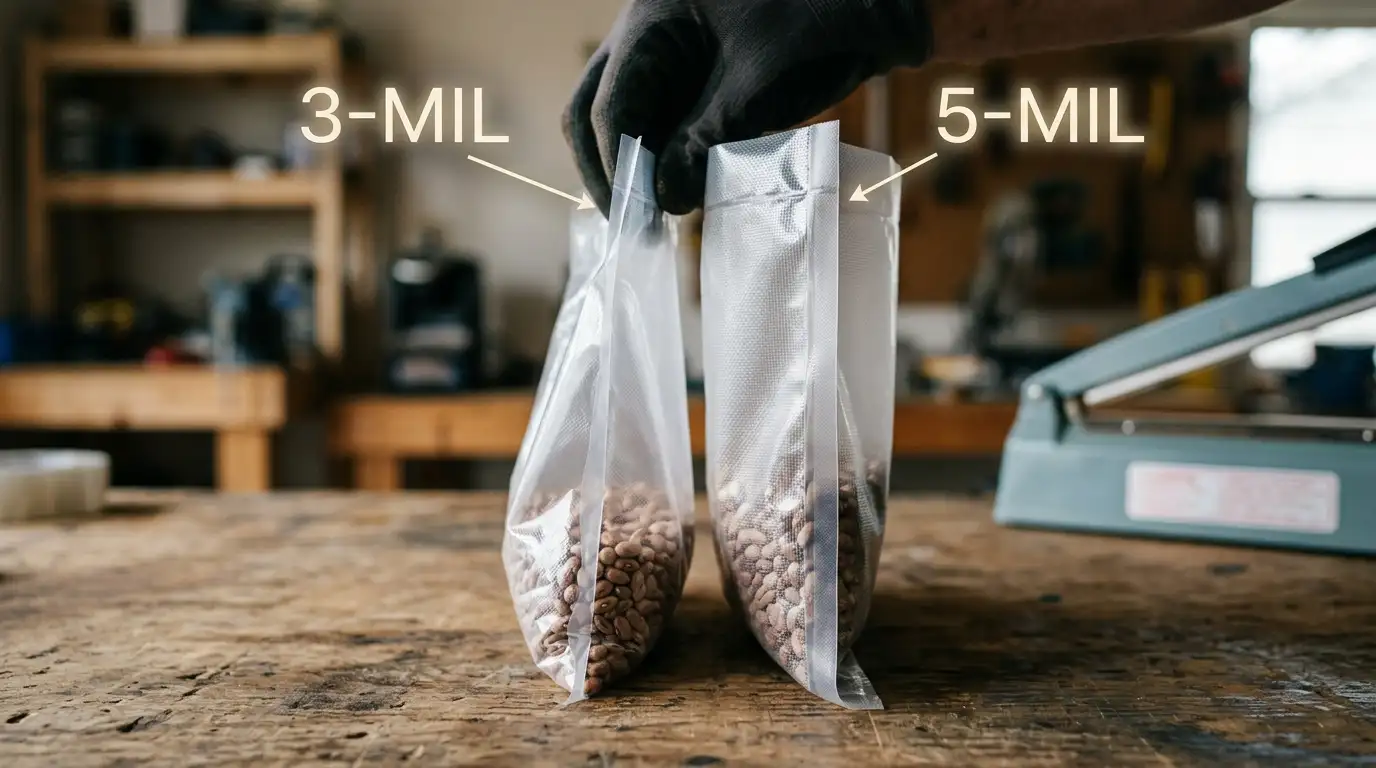
IV. Upgrade Your Plastic: 3-Mil vs. 5-Mil Bags
Sometimes, the problem isn’t just one distinct, sharp bone tip (like on a Tomahawk steak); it is the entire cut of meat itself. Rough, highly bony items like spare ribs, oxtail, or whole gutted game birds have dozens of abrasive, knobby surfaces that can cause massive friction punctures across the entire bag.
If you frequently seal these complex types of meats, using a tiny square of paper towel isn’t going to help. You need to entirely upgrade the structural integrity of your plastic bags.
The 5-Mil Solution
Standard vacuum rolls (like the ones you buy at big box grocery stores) are almost universally 3-mil thick. While 3-mil is incredibly flexible and great for sealing soft chicken breasts, ground beef, and cheeses, it is fundamentally too thin for heavy-duty bone-in meats.
You should intentionally seek out and purchase Heavy-Duty 4-Mil or 5-Mil Vacuum Bags. These premium, commercial-grade bags use a significantly thicker outer nylon extrusion layer that is exponentially more rigid and puncture-resistant. We aggressively compare the leading brands to see which ones actually survive the deep freeze in our guide: Heavy Duty 5-Mil Bags vs Standard Vacuum Bags for Bone-In Meat.
V. The Double Bag & Canvas Method (Extreme Cases)
If you are sealing incredibly sharp, heavy items (like an intricate crown roast, a freshly sawed deer femur intended for soup stock, or a rack of jagged lamb ribs) and you only have standard, thin 3-mil bags available in your kitchen, you must use the Double Barrier Method to guarantee success.
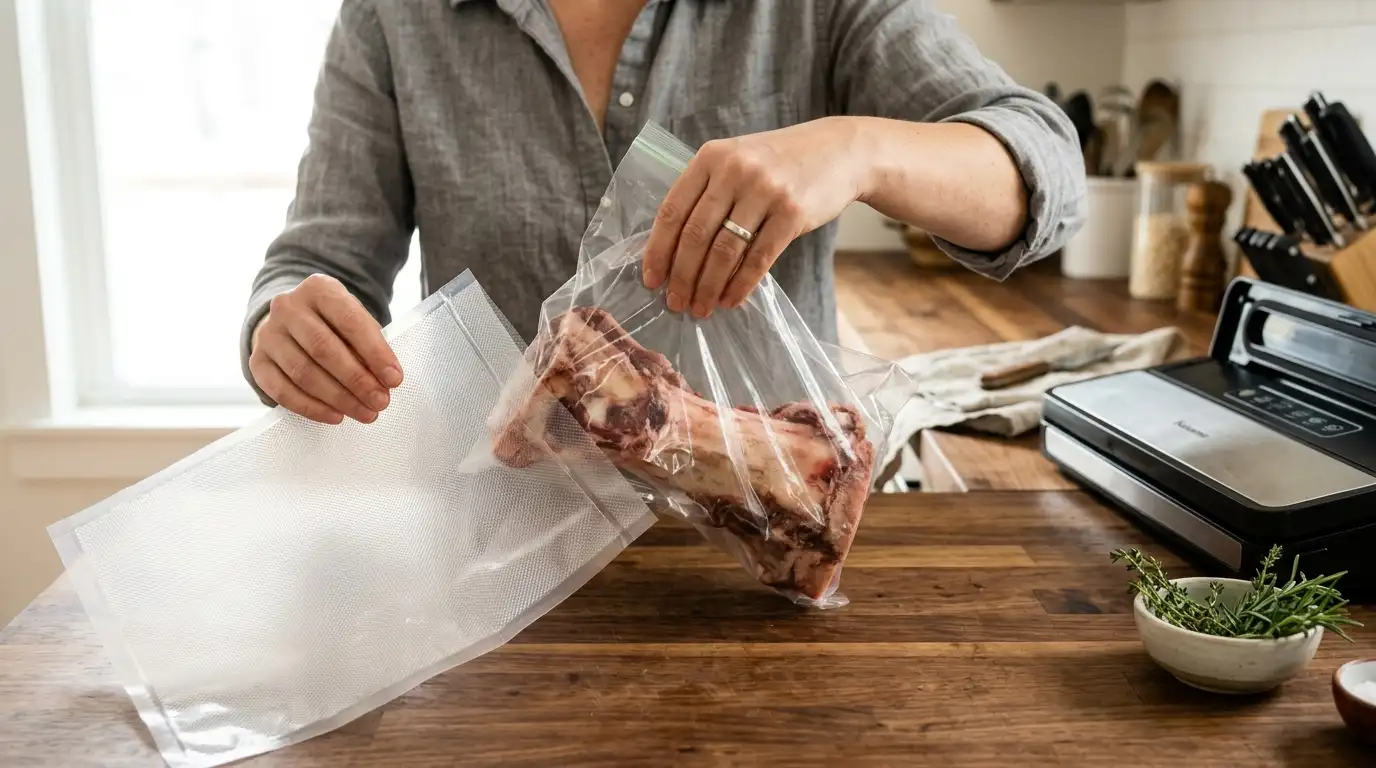
The Double Bag
Place the bony meat inside a standard, cheap, thin Ziploc or sandwich bag. Do NOT zip it shut. Then, place that unsealed Ziploc bag entirely inside your textured vacuum sealer bag, and vacuum seal it normally on your machine. The cheap inner bag acts as a sacrificial friction layer; if the sharp bone rubs and punctures the inner bag during the vacuum process, the thick outer vacuum bag remains perfectly intact and airtight.
The Canvas Wrap
For the absolute most extreme cases (like massive, raw dog-chew bones with splintered edges), wrap the entire bone tightly in a clean, reusable muslin cloth, a piece of heavy parchment paper, or thick brown butcher paper before sliding it into the vacuum bag. The thick paper provides 360-degree shielding against punctures.
Explore the Vacuum Sealing Hub
Don’t stop here! Dive deeper into the science of preservation, explore head-to-head machine comparisons, and read our latest hardware reviews for 2026.
FAQ: Sealing Bone-In Meat
2026 Guide: Micro-Punctures, Bone Guards & Preservation
Butcher’s Tip: If you are out of bone guard tape, you can fold a spare, empty vacuum bag a few times and place it over the sharp bone before sealing!
