
Vacuum Sealer Not Sealing Wet Foods? Here’s the Ultimate Fix (2026)
You have just spent hours perfectly marinating a beautiful flank steak, or perhaps you spent the entire afternoon simmering a rich, homemade soup. You carefully place the food into the bag, lock the heavy lid of your vacuum sealer down, and confidently hit the start button.
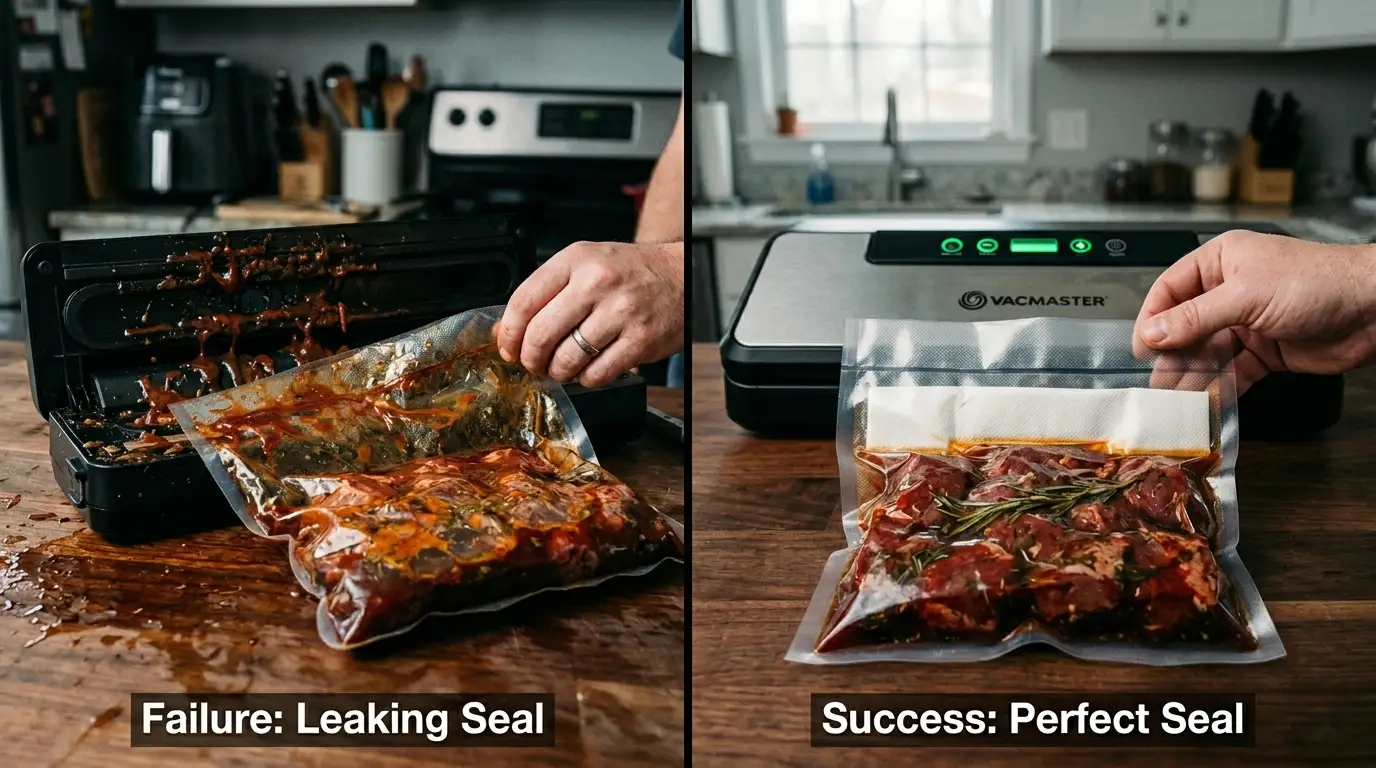
But instead of creating a perfect, airtight package ready for the deep freeze, the machine ruthlessly sucks the liquid straight up the bag. It spills sticky marinades and raw meat juices all over your pristine kitchen counter, floods the machine’s drip tray, and leaves you with a greasy plastic bag that simply refuses to seal shut.
If this sounds familiar, take a deep breath; you are not alone. A vacuum sealer not sealing wet foods is the single most common, infuriating frustration among home chefs and bulk meal preppers. The issue is rarely a broken machine; it is a fundamental mechanical flaw in how standard external vacuum sealers operate. Fortunately, you don’t need to throw away your appliance. In this guide, we will explain exactly why your machine is failing to fuse the plastic and give you the proven, step-by-step hacks to cleanly seal wet ingredients every single time.
The Quick Answer
Standard external vacuum sealers physically suck air out of the bag, taking liquid up with it. When liquid hits the heating bar, it creates steam, cooling the element and preventing the plastic from melting together. To fix this, you must stop the liquid before it reaches the seal line. Use the Paper Towel Hack to absorb marinades, the Pre-Freeze Method to solidify heavy soups, or hang the bag off the edge of your counter using the Gravity Hang Method.
For more advanced troubleshooting across all your appliances, be sure to visit our master directory: Vacuum Sealing Excellence: The Definitive Guide for 2026.
I. The Core Problem: Why External Sealers Hate Liquid
To permanently fix the problem, you must first understand the mechanical physics of your appliance. Most household machines available at big-box stores (like a standard FoodSaver, Nesco, or NutriChef) are technically categorized as “External Suction” sealers.
They work by clamping down on the open end of a textured plastic bag and literally using a small motor to suck the air out of the opening. Here is the fatal engineering flaw: The vacuum pump is blind. It cannot tell the physical difference between air and liquid. As the ambient air is violently evacuated from the bag, any liquid inside is pulled rapidly upward right along with it.
Thermodynamics: The Steam Barrier
When that rogue liquid reaches the red-hot Teflon heating bar at the top of the machine, culinary disaster strikes. The liquid instantly boils upon contact with the searing heat, creating microscopic pockets of steam.
This steam instantly cools the internal heating wire and creates a physical, watery barrier between the two layers of plastic. Without pure, dry plastic-on-plastic contact, it is chemically impossible for the bag to melt together and form a watertight polymer weld. This exact liquid interference is also a common cause of another highly frustrating issue we cover deeply in Why Do Vacuum Bags Lose Their Seal in the Freezer?.
II. Hack #1: The Paper Towel Barrier (The Free Fix)
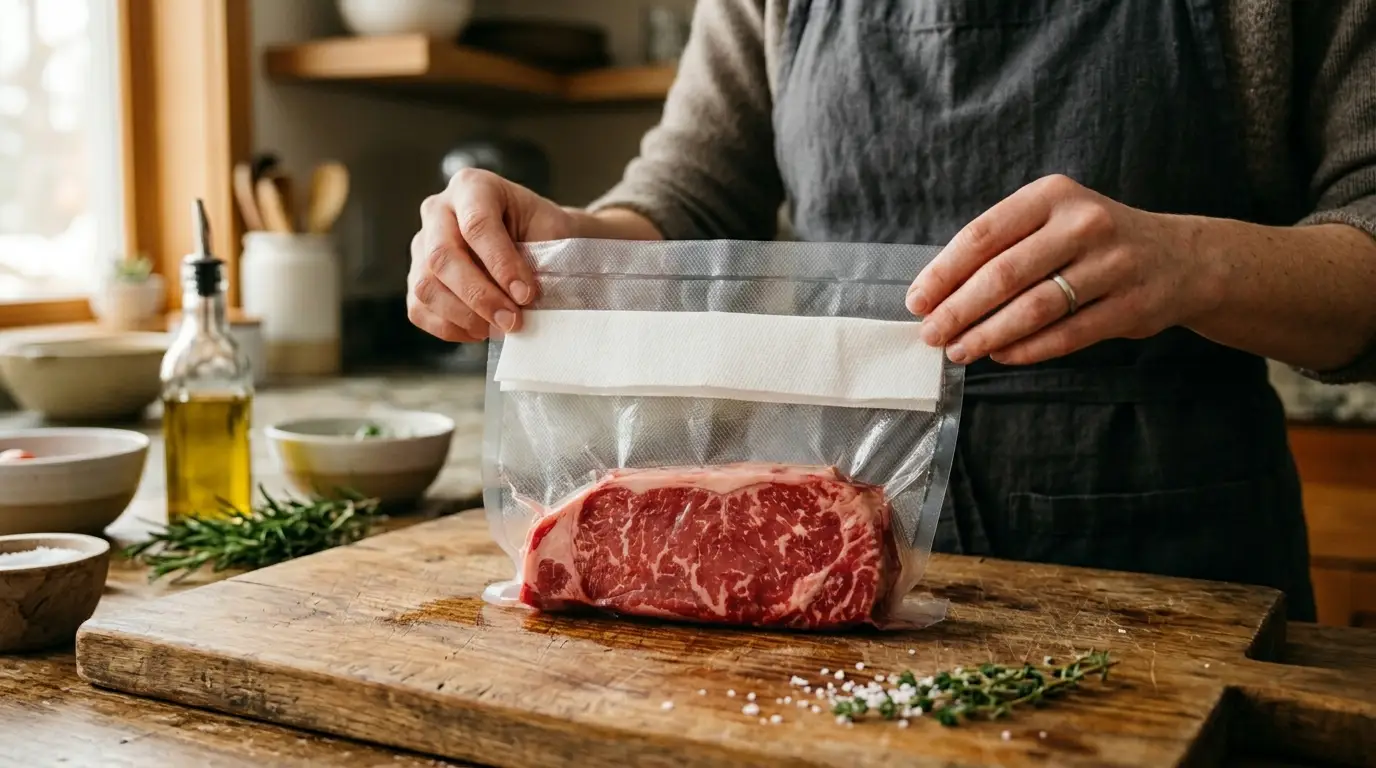
If you are dealing with moderately wet foods—like a juicy chicken breast, freshly washed vegetables, or a flank steak sitting in a few tablespoons of olive oil marinade—the paper towel hack is your absolute best friend.
-
Step 1: The Technique
Cut a clean, heavy-duty paper towel into a long rectangular strip that is about two inches wide and exactly as long as the horizontal width of your vacuum bag. -
Step 2: The Placement
Insert your meat and marinade into the bottom of the bag. Then, slide the paper towel strip into the top of the bag, positioning it horizontally about one inch below the sealing line where the machine will clamp down. -
Why It Works:
As the machine engages and sucks the air out, the juices will inevitably be pulled upward. However, capillary action takes over. The paper towel acts as a physical dam, aggressively absorbing the liquid before it can bridge the gap and reach the Teflon heating element, ensuring the top rim of the plastic remains perfectly dry for a strong, flawless seal.
For an even deeper dive into variations of this specific technique, check out our tutorial on How to Vacuum Seal Liquids Without a Chamber Sealer: 3 Proven Hacks.
III. Hack #2: The Pre-Freeze Method (For Soups and Heavy Marinades)
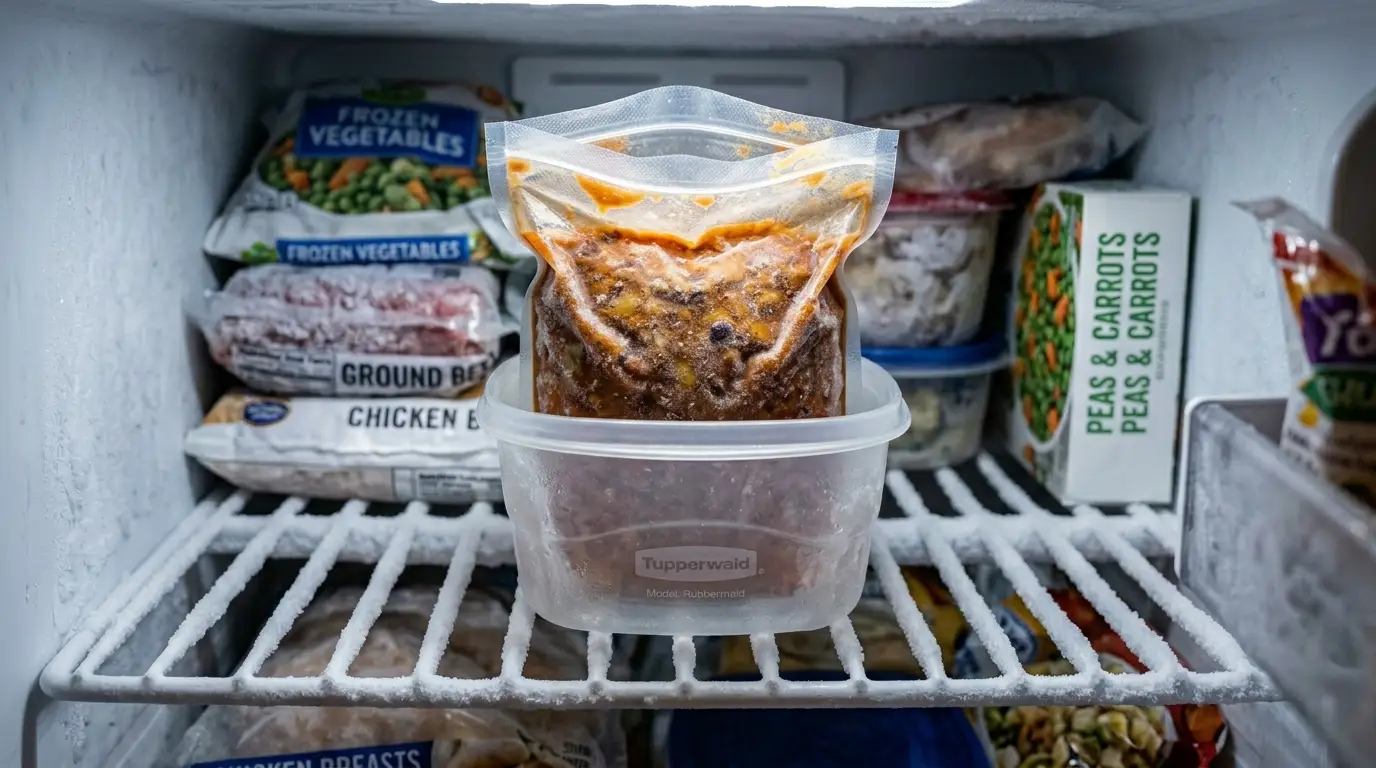
If you are trying to seal completely liquid items—like massive batches of homemade chili, rich bone broths, or heavily marinated pork shoulders sitting in cups of teriyaki sauce—a paper towel will simply be overwhelmed instantly. You must use the professional pre-freeze method.
-
Step 1: The Technique
Place your completely liquid soups or wet meats into the bottom of the vacuum bag. Do NOT attempt to vacuum seal it yet. Instead, prop the bag carefully upright in your freezer. You can place the unsealed bag inside a large Tupperware container or a tall pitcher to keep it standing vertically so it doesn’t spill. -
Step 2: The Timing
Leave the bag standing in the deep freeze for 1 to 2 hours. You do not need the liquid to become a rock-solid block of ice; you simply need the surface of the liquid to become a hardened, frozen slush. -
Step 3: The Seal
Once the top layer of the liquid has safely hardened, pull the bag out, put the open rim into your machine, and vacuum seal it normally. Because the liquid has solidified into a state of high viscosity, it cannot physically be sucked up into the pump.
While this classic trick is effective, it takes hours. We rigorously compare this old-school method against incredibly fast, modern commercial solutions in our comprehensive guide: Liquid Block Bags vs Freezing Liquids Before Vacuum Sealing.
IV. The Upgrade: Liquid Block Bags
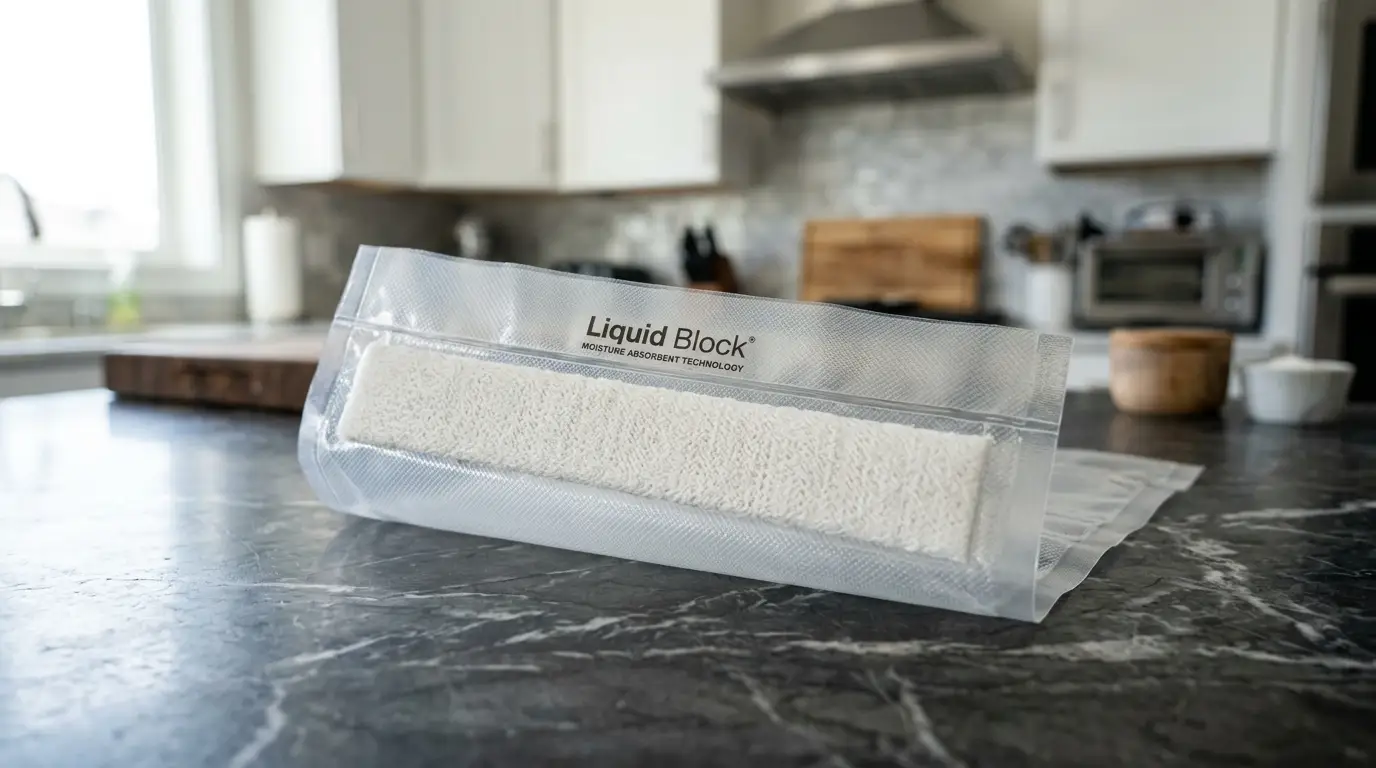
If you hate the tedious process of cutting up paper towels, or if you simply lack the patience to wait two hours for your soup to pre-freeze on a busy Sunday afternoon, the packaging industry has finally created a brilliant technological solution specifically for external suction machines: Liquid Block Bags.
These are specialized, premium vacuum sealer bags that are manufactured with a thick, highly absorbent polymer strip already permanently built into the plastic lining, just below the top opening.
You simply drop your dripping wet food in and seal it normally. The built-in strip acts automatically, aggressively trapping rising marinades and raw blood, protecting your machine’s fragile heating element without any extra effort on your part. Read our full performance reviews and brand recommendations in The Best Vacuum Sealer Bags for Wet Food: Liquid Block Technology.
V. The Ultimate Solution: The Chamber Vacuum Sealer
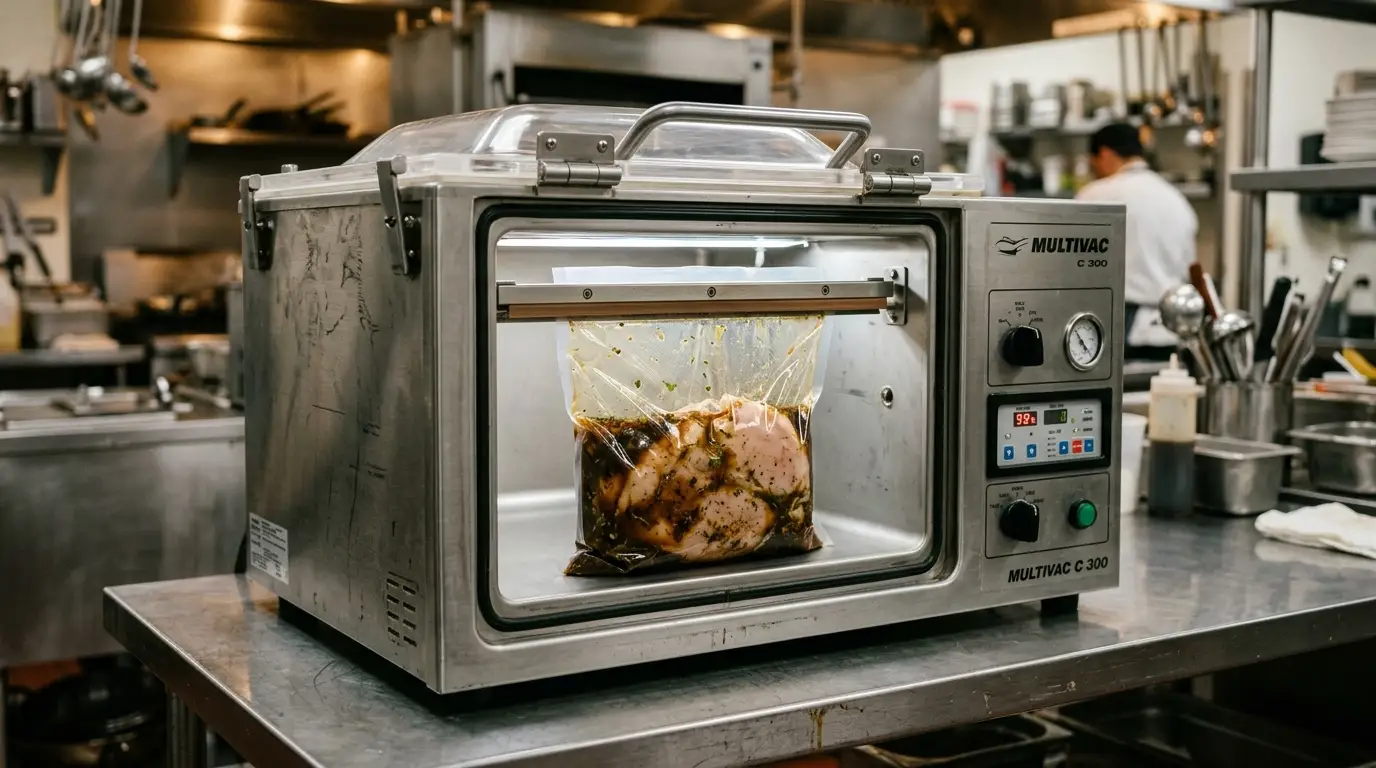
If you find yourself constantly battling messy, wrinkled bags because you frequently process bulk soups, stews, or wet marinades for your weekend sous vide prep, you are simply using the wrong tool for the job. You need to officially upgrade to a Chamber Vacuum Sealer.
Unlike cheap external suction machines that pull air out of the bag opening, chamber sealers operate on a completely different law of physics. You place the entire unsealed bag flat inside a heavy-duty, gasket-sealed metal box (the chamber).
The Physics of Equalized Pressure
When you hit start, the heavy-duty pump evacuates the air from the entire chamber box all at once. This means the atmospheric pressure inside the plastic bag and outside the plastic bag remains perfectly, flawlessly equal at all times. Because there is absolutely no pressure differential acting on the bag, liquids are never aggressively sucked or forced upward. You can literally place a bag of pure, unadulterated water into a chamber sealer and it will seal the rim perfectly dry every single time.
If you are finally ready to make the jump to professional culinary equipment, read our comprehensive mechanical breakdown: Chamber Vacuum Sealer vs. External Suction: Is the Upgrade Worth It?.
Bonus: How to Clean Your Machine After a Massive Spill
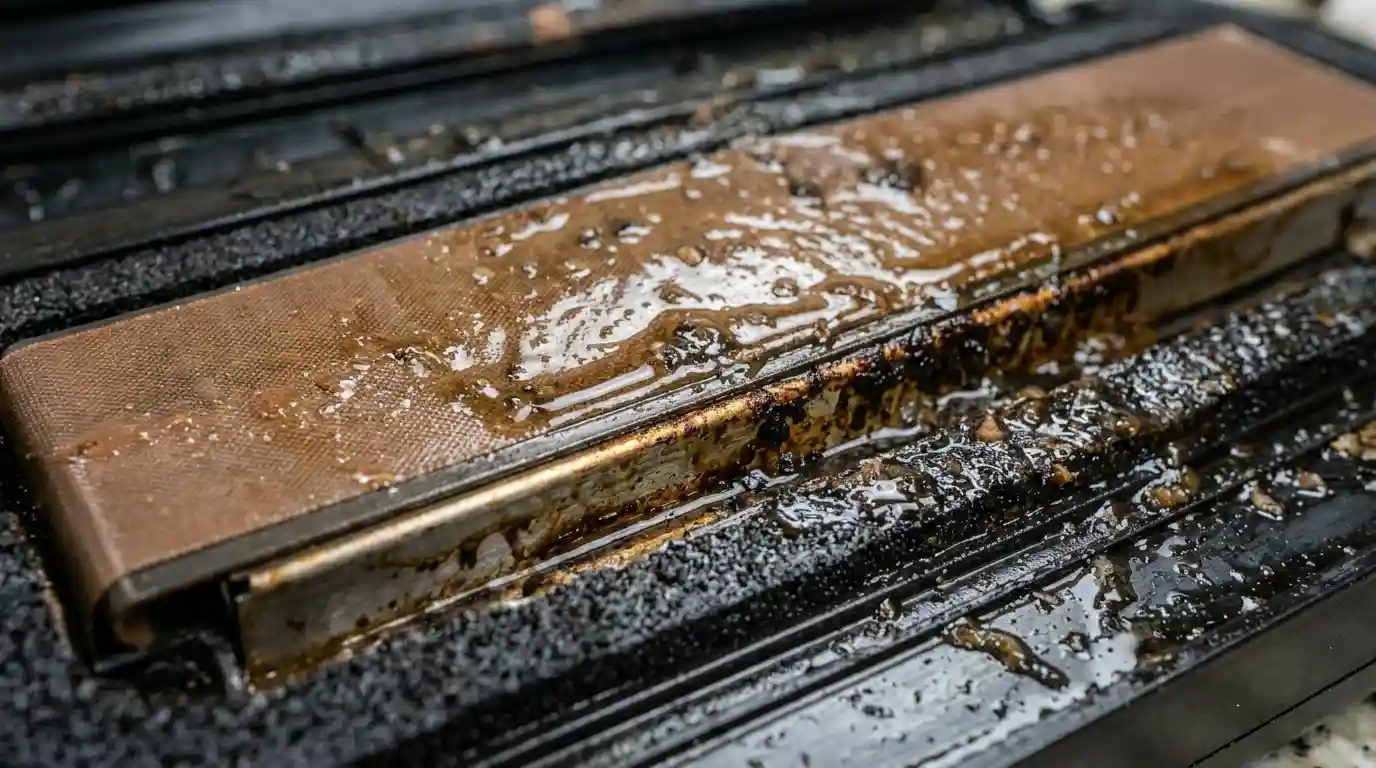
If you failed to catch the liquid in time and your vacuum sealer just ingested half a cup of sticky teriyaki marinade, you must clean it immediately before the sugars harden and destroy the pump or grow toxic mold.
- 💧 Empty the Drip Tray: Most modern external sealers have a removable plastic drip trough located right below the vacuum channel. Pull it out and wash it thoroughly with hot, soapy water. Do not let raw chicken juice sit in this tray overnight.
- 🧼 Clean the Foam Gaskets: The black foam gaskets that seal the lid shut are incredibly fragile. If sticky, sugary marinade dries on them, the gaskets will compress and harden, permanently destroying your machine’s ability to create suction. Gently wipe them with a damp, warm cloth (no harsh chemicals) and let them air dry completely before closing the lid.
- 🔥 Inspect the Teflon Tape: Check the golden/brown Teflon tape covering the heating element. If sugar burned onto it during the failed seal, it will cause the machine to melt completely through the plastic on your next attempt. If it is charred, you must replace the tape. Learn how in Why Your Vacuum Sealer is Melting the Bag.
Explore the Vacuum Sealing Hub
Don’t stop here! Dive deeper into the science of preservation, explore machine maintenance hacks, and read our latest commercial hardware reviews for 2026.
FAQ: Vacuum Sealing Wet Foods
2026 Guide: Handling Liquids, Marinades, and Machine Safety
Pro Tip: If you seal a lot of wet foods, place a folded paper towel inside the bag between the food and the seal line. It acts as a final barrier to catch stray juices!
Vacuum Sealer Not Sealing Wet Foods? Full Fix Guide