
The Water Displacement Method: How to Vacuum Seal Meat with a Ziploc (2026)
Whether you are eager to try your new sous vide immersion circulator or just trying to protect a batch of meal-prepped chicken breasts from freezer burn, removing oxygen from your packaging is essential. But what if you don’t own a $150 vacuum sealer machine?
Enter the greatest, 100% free culinary hack of the modern kitchen: The Water Displacement Method.
Often referred to in culinary circles as the Archimedes Principle, this technique relies on basic physics to replicate the results of a mechanical vacuum sealer. By using the natural hydrostatic pressure of water, you can manually force the air out of a standard plastic freezer bag, creating a remarkably tight seal that is perfect for marinating, freezing, or cooking sous vide.
In this guide, we break down the step-by-step process of the water displacement method, the crucial rules of bag selection, and exactly when this free hack outperforms an expensive machine. For a comprehensive look at all our food preservation techniques, explore our master directory: The Ultimate Vacuum Sealing Hub: Food Storage, Sous Vide, Mason Jars & Buying Guides (2026).
The Quick Answer
The water displacement method uses gravity and water pressure to push air out of a standard freezer bag. Place your food inside, seal the zipper almost entirely (leaving a 1-inch gap), and slowly lower the bag into a deep pot of cold water. The water pressure will crush the plastic tight against the meat, forcing the air out the top. Once the water line is just below the zipper, pinch it completely shut. This 100% free hack is perfect for short sous vide cooks and wet marinades, but it is not recommended for extreme high-heat cooking where glued bag seams might melt.
1. The Physics: How Archimedes Saves Your Steak
To truly master this technique, it helps to understand why it works so flawlessly. You don’t need a motorized pump to remove air; you just need pressure.
When you lower an object into a body of water, the water exerts pressure against the object from all sides. When that object is a flexible plastic bag filled with meat, the surrounding water acts as a perfectly contoured, incredibly powerful mold. It physically crushes the pliable plastic tightly against every single groove and crevice of the food.
The Escape Route
Because air is lighter than water, the intense hydrostatic pressure forces the trapped air upward. If you leave the top of the bag open, the water will squeeze the air completely out of the bag, leaving the plastic shrink-wrapped seamlessly against your steak. It is an elegant, foolproof application of physics that requires zero electricity and achieves near-machine-quality results in seconds.
2. Step-by-Step: The Water Displacement Technique
Executing this method requires patience and a gentle hand. Rushing the process will trap air bubbles or cause water to spill into your bag. Here is exactly how to do it flawlessly every time:
Step 1: Prep the Bag
Fold the top zipper of the bag backward (inside out) by about two inches. This prevents raw meat juices or sticky marinades from contaminating the zipper track when you load the food. Place your meat, aromatics, and marinades into a heavy-duty zipper bag. Once loaded, unfold the top rim.
Step 2: The Partial Seal
Zip the top of the bag closed, starting from one corner and working your way across. Stop right before you reach the end, leaving only a small, 1-inch opening at the very edge. This is your “exhaust port” for the air to escape.
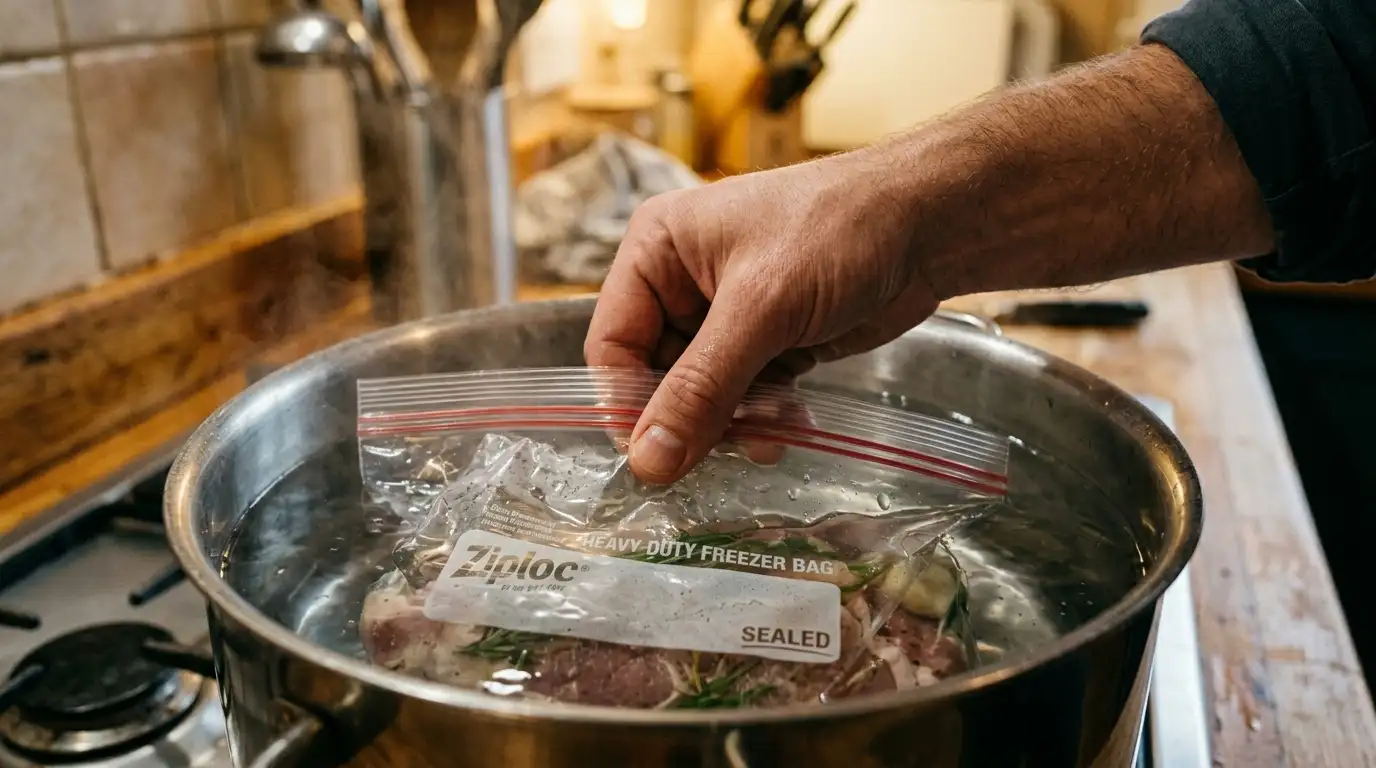
Step 3: The Submersion
Fill a large bowl, a deep cambro container, or a tall pot with cold or room-temperature tap water. Holding the bag by the unzipped corner, slowly and vertically lower the bottom of the bag into the water.
Step 4: The Squeeze
As you lower the bag deeper, you will watch the magic happen. The water pressure will visibly push the air up and out the 1-inch opening, clinging the plastic directly to the meat. Continue to lower the bag until the external water line is just below the plastic zipper. Do not let water spill inside the bag.
Step 5: The Final Seal
While the bag is still fully submerged (keeping the hydrostatic pressure actively applied against the food), quickly pinch the final 1-inch opening shut. Pull the bag out of the water. It should now be tightly vacuum-sealed and ready for the sous vide bath or the deep freeze.
3. The Marinade Advantage: Why It Beats Machines
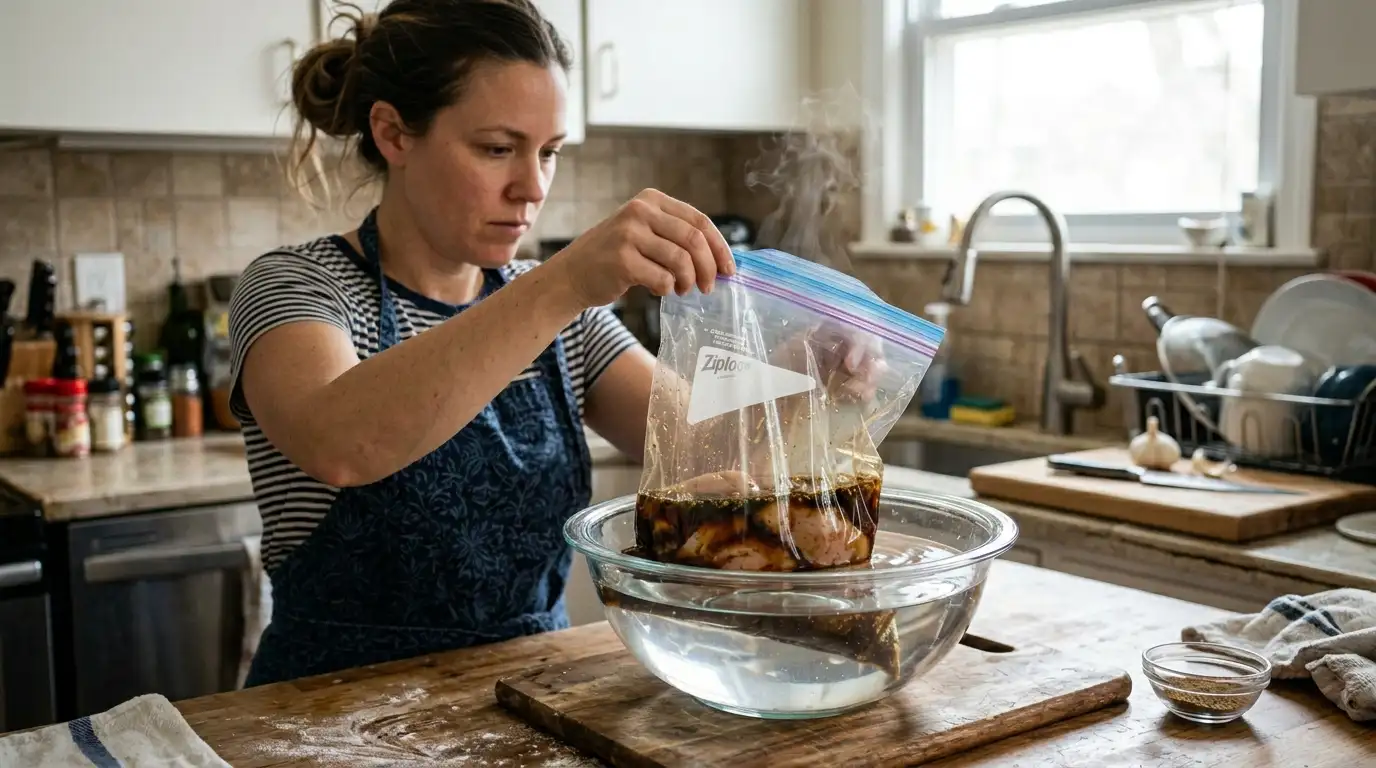
Paradoxically, this free Ziploc hack is actually vastly superior to standard external vacuum sealers when it comes to wet foods.
If you try to use a classic FoodSaver or Nesco machine to seal a chicken breast soaking in a cup of liquid teriyaki marinade, the machine’s powerful, blind suction will aggressively pull the liquid straight up the bag. The liquid will hit the red-hot Teflon heating element, immediately turn to steam, and completely ruin the plastic weld. You will be left with an unsealed bag and a massive, sticky mess inside your expensive appliance. (To prevent this, you must use the specialized tricks outlined in our guide: How to Vacuum Seal Liquids Without a Chamber Sealer: 3 Proven Hacks).
Gravity is Your Best Friend
With the water displacement method, gravity is entirely on your side. Because you are lowering the bag vertically into the water, the heavy liquid marinade stays safely pooled at the absolute bottom of the bag while the lighter air is gently pushed out the top opening. It is the cleanest, easiest, and most foolproof way to prep heavily marinated meats for sous vide without buying a $600 commercial chamber machine.
4. Crucial: Bag Selection and Heat Tolerance
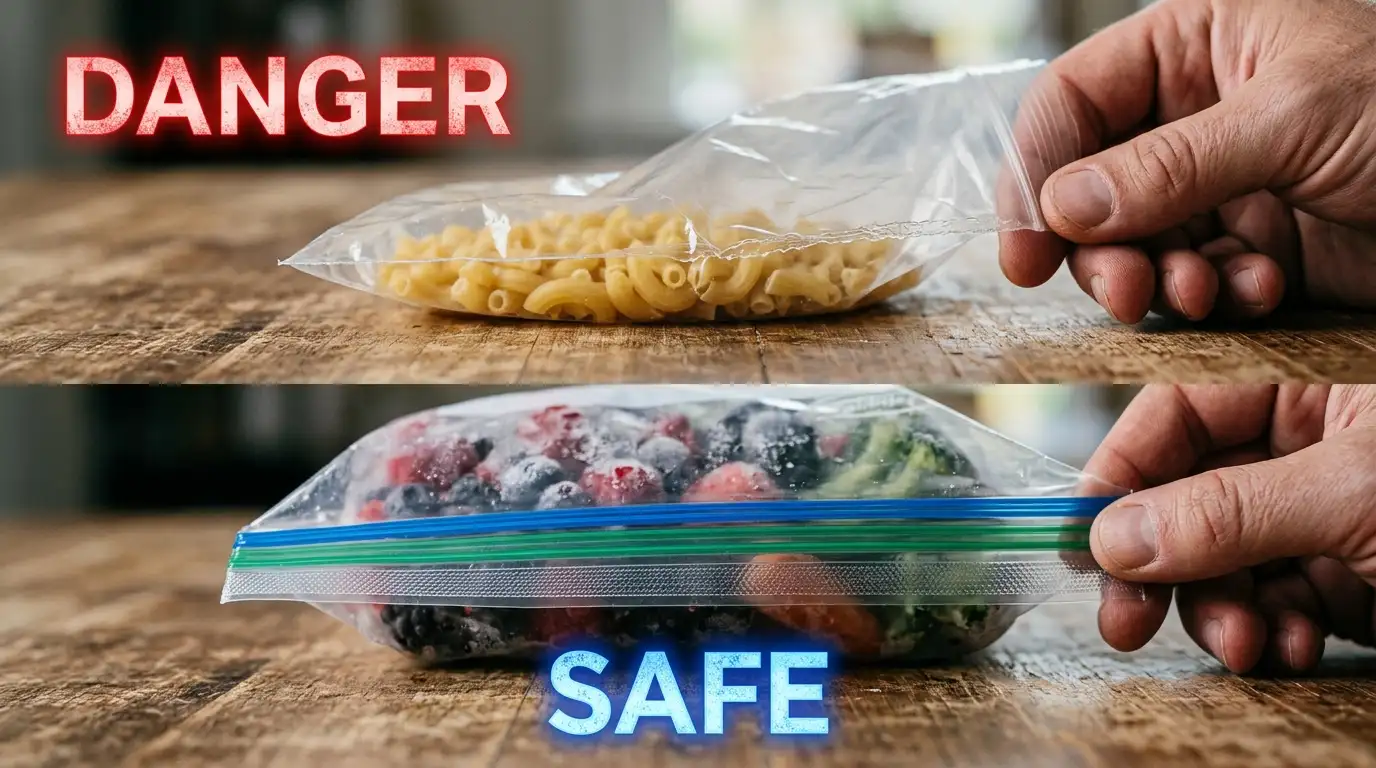
The water displacement method is an incredible culinary tool, but it is only as safe as the physical bag you choose to use. This is where most beginners make a critical, meal-ruining mistake.
- ❌ Never Use Sandwich Bags: Cheap, thin, fold-over sandwich bags or ultra-budget generic bags are not designed to withstand high heat or long-term freezing. The plastic is too thin, making it highly susceptible to bone punctures, and the weak seams will easily split under the pressure of expanding gases.
- ✅ Use Name-Brand “Freezer” Bags: You must explicitly purchase heavy-duty, BPA-free, Low-Density Polyethylene (LDPE) “Freezer” or “Storage” bags (like high-quality, double-zipper Ziplocs). These are significantly thicker than standard bags and feature much sturdier side seams.
- 🔥 The High-Heat Warning: Standard zipper bags are manufactured with glued seams. While perfectly safe for cold storage or a 130°F (54°C) medium-rare sous vide steak, those glued seams can literally melt, detach, and split at high temperatures. If you are cooking dense root vegetables at 185°F (85°C), you must abandon Ziplocs and use a true, thermally welded vacuum bag. We heavily compare the molecular safety of these plastics in our Vacuum Sealer Bags vs Freezer Bags: Is It Worth It? analysis.
5. When to Upgrade to a Machine
While the water displacement method is an incredible, free asset for your kitchen, it is not scientifically perfect.
It is physically nearly impossible to remove 100% of the microscopic air pockets using manual water pressure alone. For a short, 2-hour sous vide cook or a quick month in the freezer, these tiny pockets are perfectly fine and harmless. However, if you are pushing the limits of culinary science, these tiny imperfections become massive liabilities.
The Floating Brisket Problem
If you are attempting a 48-hour or 72-hour sous vide cook (like a massive, tough brisket or pork shoulder), those tiny trapped air pockets will eventually expand as they are subjected to sustained heat. This expanding gas will cause your bag to inflate into a balloon and float to the surface, breaking the water line and cooking entirely unevenly. A machine-pulled vacuum ensures absolute zero buoyancy.
The Freezer Burn Inevitability
Furthermore, if you are storing meat in a deep chest freezer for over six months, those tiny, residual air pockets will inevitably lead to sublimation. Moisture will be drawn out of the meat and into the trapped air, causing permanent, irreversible freezer burn. Only a true vacuum seal can prevent long-term freezer burn.
Ready to Make the Jump?
If you find yourself cooking sous vide every single week or bulk-buying meat for long-term storage, it is officially time to invest in a machine.
Read: Ziploc Method vs Vacuum Sealer (Full Showdown)Explore the Vacuum Sealing Hub
Don’t stop here! Dive deeper into the science of preservation, explore head-to-head machine comparisons, and read our latest commercial hardware reviews for 2026.
FAQ: The Water Displacement Method
2026 Guide: Sous Vide Hacks, Freezing, and Safety
Sous Vide Tip: If you are doing a long cook (over 12 hours) using a Ziploc, double-bag the meat! The heat can sometimes weaken the zipper over long periods.
