
How to Fix a Refrigerator That Is Leaking Water Inside (2026 DIY Guide)
Opening your refrigerator to grab fresh produce for breakfast, only to find your expensive vegetable crisper drawers floating in a mysterious, stagnant puddle of water, is a terrible way to start the day.
When a refrigerator actively leaks water from the outside (pooling on your kitchen floor), it is usually an obvious mechanical failure, like a severed plastic ice maker line or a cracked external drip pan. But when water pools exclusively inside the main cabin—specifically at the very bottom, hiding quietly underneath the deli or vegetable drawers—it signals a completely different, highly specific thermal issue.
The exceptionally good news? Your refrigerator is not dying, the vital compressor is perfectly fine, and you rarely need to buy expensive replacement parts. An internal water leak is almost always a basic plumbing or drainage issue caused by a simple physical blockage. In this comprehensive diagnostic guide, we break down exactly how to fix a refrigerator that is leaking water inside so you can save your groceries and completely avoid a costly $150 repair bill.
The Quick Answer
If water is pooling under your crisper drawers, the defrost drain tube is clogged. When the fridge melts daily frost off its coils, the water cannot drain into the pan below, forcing it to overflow inside the cabin. To fix it, unplug the fridge, locate the small drain hole at the bottom center of the rear internal wall, and flush it aggressively with hot water using a turkey baster. Use a piece of flexible wire or a zip-tie to push the solid ice or food debris through the tube until the water flows freely again.
1. The #1 Culprit: A Clogged Defrost Drain
To truly understand why your fridge is leaking, you need to understand the thermodynamics of how modern appliances cool. Older refrigerators required you to manually chip ice away from the walls every few months. Modern refrigerators run a hidden, automatic defrost cycle multiple times a day to gently melt away the inevitable frost that builds up on the internal cooling coils (the evaporator).
Normally, this melted frost drips harmlessly into a small V-shaped plastic trough at the back of the fridge, flows down a small drain hole, and travels through a rubber tube to a wide, shallow pan located underneath the appliance (next to the hot compressor) where it safely evaporates into the room air.
The Design Flaw
However, this drainage system is incredibly fragile. If a rogue piece of spinach, a tiny food crumb, a piece of plastic wrapper, or a solid plug of ice blocks that tiny dime-sized drain hole, the melted frost literally has nowhere to go. It quickly overflows the plastic trough, cascades down the back interior wall like a waterfall, and pools directly beneath your lowest crisper drawers. In 90% of cases, a clogged defrost drain is the exact, undeniable cause of your indoor puddle.
2. How to Unclog the Defrost Drain (The 10-Minute Fix)

Fixing a clogged drain is an incredibly easy, highly satisfying DIY project that requires absolutely zero electrical knowledge and utilizes tools you likely already have sitting in your kitchen drawers.
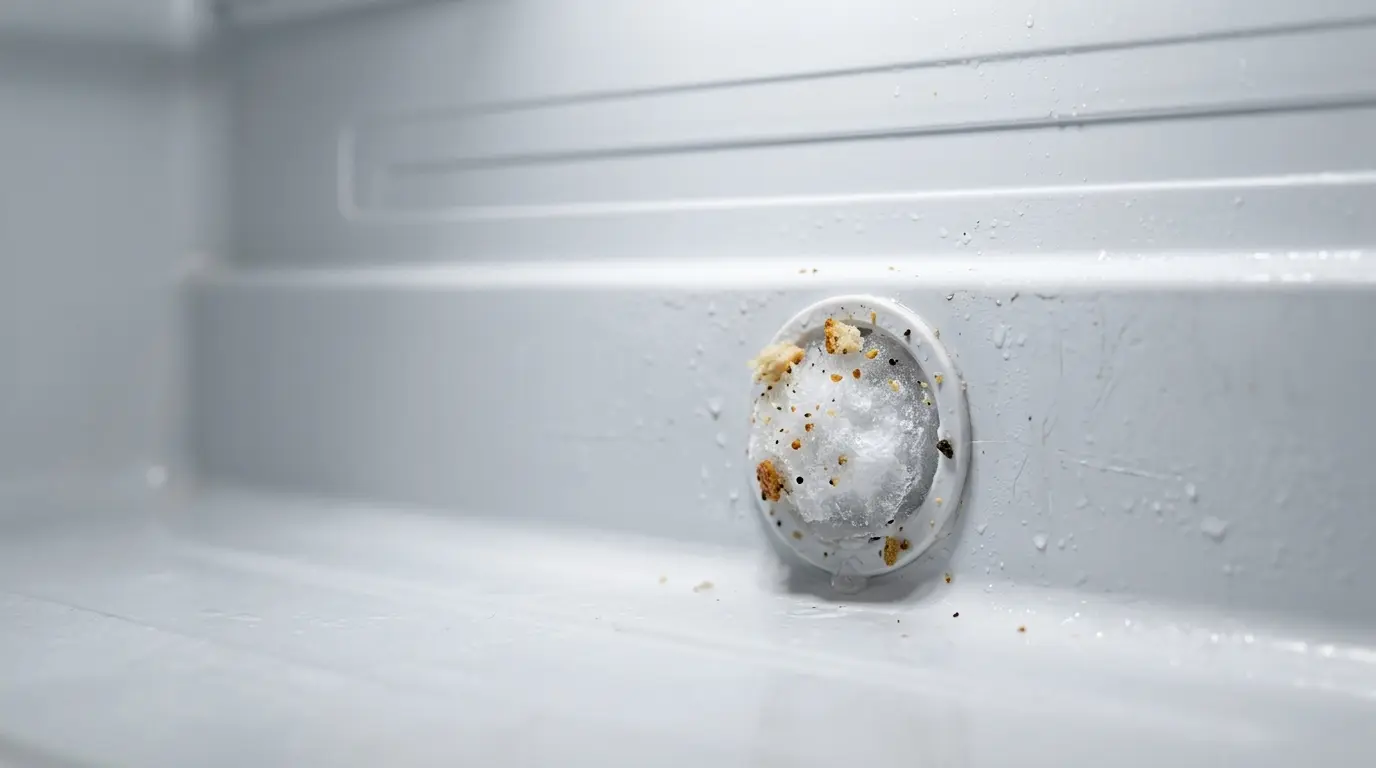
Step 1: Locate the Drain Hole
First, unplug the refrigerator from the wall to ensure safety while working near moisture. Pull out your bottom crisper drawers entirely and set them aside. Grab a flashlight and look at the lower center of the interior back wall.
You will see a small hole (about the size of a dime), often situated in a slight plastic depression or V-trough. If you cannot see it, it may be hidden behind a thin plastic access panel held by a single Philips screw.
Step 2: Clear the Ice (The Baster Method)
If the hole is blocked by a solid chunk of ice, do not chip at it with a knife or a screwdriver! The plastic liner of a fridge is incredibly thin; if you puncture it, the appliance is ruined.
Instead, fill a standard kitchen turkey baster or a large plastic food-safe syringe with hot (not boiling) tap water. Squirt the hot water directly and forcefully into the frozen hole. Wait a few seconds, soak up the overflow with a towel, and repeat until the ice completely melts and the hole is visible.
Step 3: Snake the Line
Once the ice is gone, you need to push out the physical food debris (the actual cause of the clog) deeper down the tube.
Take a flexible pipe cleaner, a long, thick plastic zip-tie, or a 2-foot piece of thick weed-whacker line. Gently push it down the drain hole and snake it back and forth. You are essentially plunging the line to force the sticky food clog out of the bottom of the tube.
Step 4: The Final Baking Soda Flush
Once the physical clog is pushed through, you need to sanitize the line.
Flush the drain one last time with a mixture of hot water and a tablespoon of dissolved baking soda. This powerful flush clears out any lingering bacteria, breaks down residual grease, and completely eliminates the sour, mildew smell often associated with stagnant fridge water. You should hear the water successfully trickling down into the drip pan under the fridge.
Hardware Flaw: The “Duckbill” Valve
If you own a specific model of Samsung or LG refrigerator and this clog happens every single month, the issue is at the very bottom of the tube. Manufacturers used a rubber “duckbill” valve at the end of the drain line to let water out while keeping warm air from entering.
However, over time, this rubber valve gets sticky and glues itself completely shut, trapping the water. To permanently fix this, you must access the back of the fridge, locate the rubber valve over the drip pan, and either physically clean it or carefully snip the very tip of the rubber lips off with scissors to ensure it never glues itself shut again.
3. Inspect the Water Filter Housing
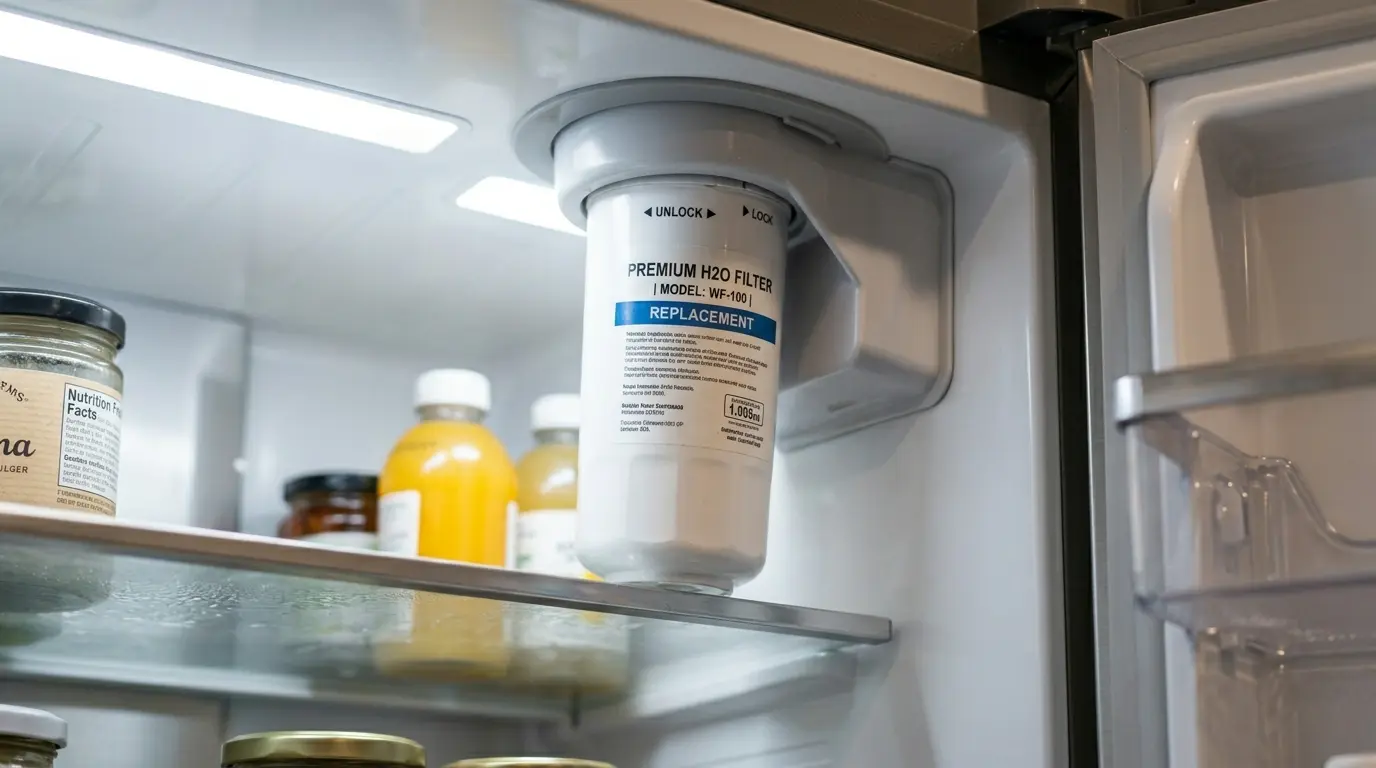
If your refrigerator has a built-in internal water dispenser or an automatic ice maker, the primary water filter is usually housed right inside the fresh food compartment (often nestled securely in the top right corner near the ceiling).
The Issue: Pressure Drips
The water line running through that filter is highly pressurized. If the water filter was installed incorrectly (not twisted all the way until it clicks), if the tiny rubber O-rings on the filter stem are cracked, or if the plastic housing assembly has hairline fractures from old age, water will slowly, silently drip down the internal walls every single time the system is pressurized to make ice.
The Fix: Inspection and Replacement
Remove the water filter completely and inspect the heavy plastic housing socket with a bright flashlight. If you see active water dripping from the connection point, or heavy calcium scaling around the seals, replace the filter immediately. If the plastic housing itself is physically cracked, you will need to order an OEM replacement assembly.
4. Extreme Condensation and Blocked Vents
Sometimes, the terrifying “leak” isn’t a mechanical leak at all; it is aggressive, heavy condensation literally raining down from the top shelves.
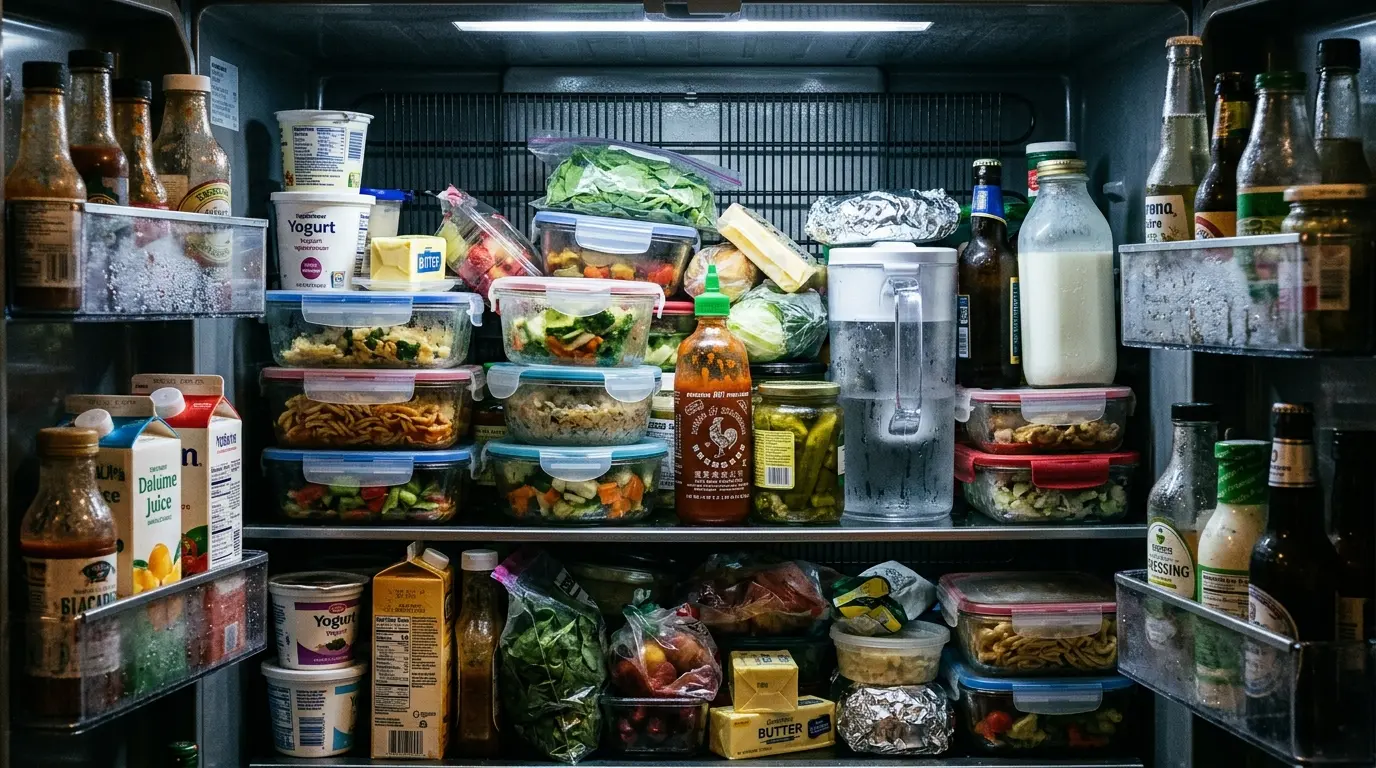
Sub-zero cold air is generated in the freezer and aggressively pushed into the refrigerator compartment through a series of small, louvered plastic vents located in the back wall. If you overpack your fridge after a massive grocery run and violently shove large pizza boxes, tall Tupperware, or plastic grocery bags directly against these vents, you completely restrict the internal airflow.
The Thermodynamics of the Puddle
This blockage causes massive, erratic temperature fluctuations inside the cabin. Relatively warm, humid air hits the physically blocked, freezing cold vents, instantly creating heavy condensation. This moisture gathers on the ceiling and shelves, eventually dripping heavily down to the bottom crispers, perfectly mimicking a plumbing leak.
The Fix: Treat your fridge like a wind tunnel. Pull all large items, boxes, and bags at least 2 inches away from the interior back wall to allow the cold air to circulate freely and evenly.
5. Failing Rubber Door Gaskets
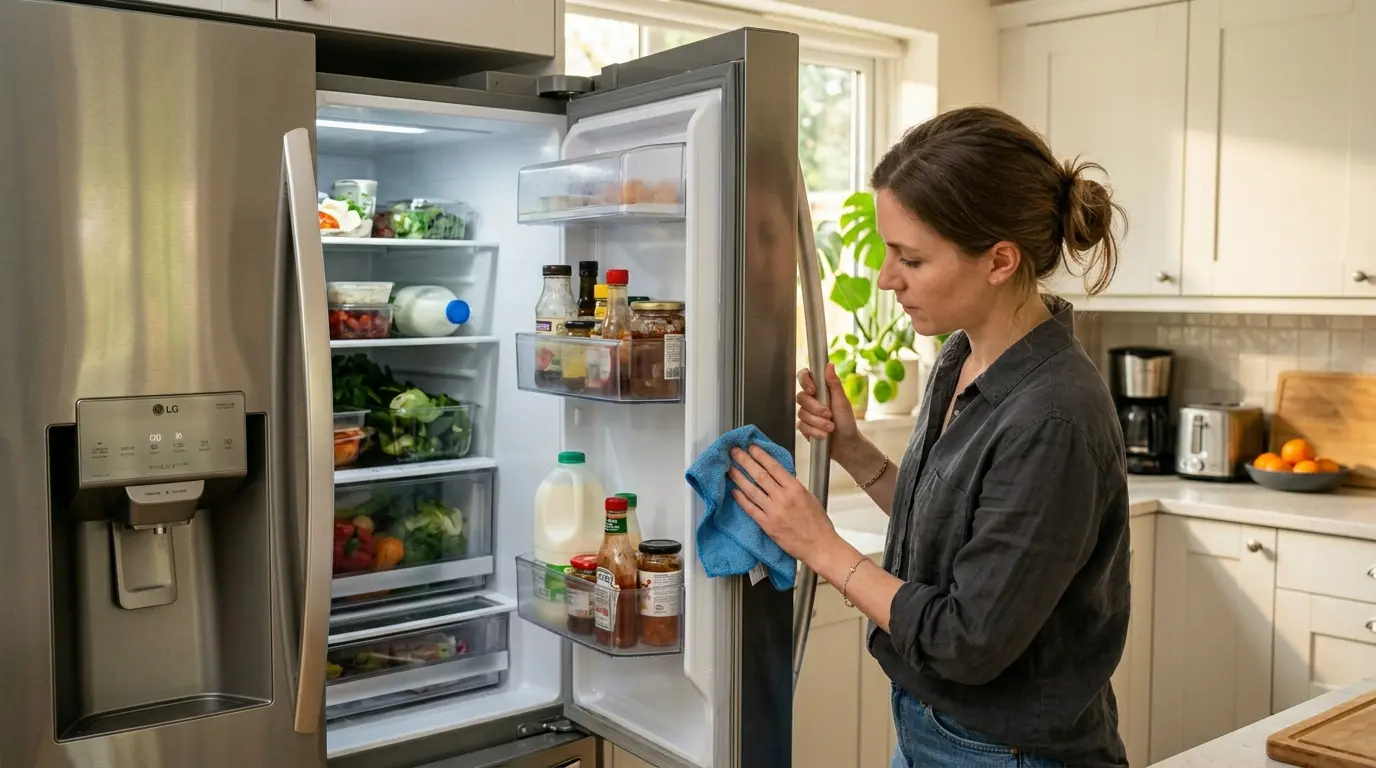
Just like we covered heavily in our diagnostic guide on How to Fix a French Door Ice Maker That Keeps Freezing Up, a failing magnetic rubber door gasket is the absolute enemy of a dry, efficient refrigerator.
If the heavy rubber seal on your main fridge door is torn by sharp fingernails, dirty from sticky syrup spills, or permanently warped from old age, it cannot form an airtight seal against the metal cabinet. This means warm, highly humid room air constantly seeps into the freezing cold cabin 24 hours a day.
The Humidity Overload
This relentless influx of excess humidity creates far more frost on the cooling coils than the automatic defrost cycle was originally engineered to handle. When the system finally attempts to melt that massive, oversized block of frost, it simply overwhelms the capacity of the small plastic defrost drain trough, causing it to cascade over the edge and onto your floor.
The Fix: Clean and Replace
First, clean your entire gasket thoroughly with warm soapy water to remove sticky residues that prevent a tight magnetic connection. If the rubber feels brittle, cracked, or is permanently warped away from the metal frame, you must replace it. Simply peel the old gasket out of its track and firmly press a new OEM gasket into the door frame.
Explore More Appliance Diagnostics
Don’t let a minor plumbing issue ruin your kitchen. Visit our complete hub for more expert troubleshooting tips, DIY repair guides, and updated buying recommendations.
FAQ: Refrigerator Water Leaks
2026 Guide: Troubleshooting Internal Pooling & External Spills
Maintenance Tip: A turkey baster and a mix of warm water/baking soda is the best tool for blasting clogs out of a refrigerator drain line!
