
Mini Fridge vs Beverage Cooler for Dry Aging Beef: Which is Best? (2026)
Dry-aged beef is the absolute pinnacle of the steak world. The meticulous process—resting massive subprimal cuts of meat in a highly controlled environment for 30 to 60 days—evaporates excess moisture to intensely concentrate flavor, while naturally occurring enzymes actively break down tough connective tissue. The result is a deeply complex, nutty steak you can literally cut with a butter knife.
In a high-end commercial steakhouse, a single authentic dry-aged ribeye can easily cost upwards of $100. This massive premium is exactly why thousands of culinary enthusiasts are turning to DIY home setups. However, you cannot simply toss a raw, $150 brisket into your main kitchen fridge next to the milk and hope for the best. You need a dedicated, sterile environment with absolute, unwavering temperature and humidity control.
The two most common foundations for building a DIY “Meat Cave” are the Mini Fridge and the Beverage Cooler. While they look incredibly similar from the outside, their internal mechanics handle crucial airflow and thermodynamics completely differently. Choosing the wrong appliance can mean the difference between a world-class steak and a rotten, toxic piece of meat.
Important Note: The Real Cost of Kegerator Conversion
If you are repurposing mini fridges for DIY projects, you might also be considering building a home draft beer system. One of the biggest misconceptions when building a draft system is the total cost of conversion. While finding a used appliance might seem cheap, the specialized hardware required to pour a perfect pint adds up quickly.
The Parts You Need: Whether you build a Kegerator or a Keezer (see our Mini Fridge vs Chest Freezer for Kegerator guide), the internal draft components are essentially identical. You will need a high-pressure CO2 tank, a dual-gauge gas regulator to precisely control serving pressure, thick beverage-grade vinyl tubing, a liquid disconnect for the keg, and a stainless steel faucet and shank assembly.
The Financial Reality: Even if you acquire a free mini fridge or chest freezer on Craigslist, the high-quality stainless steel draft components, the heavy CO2 tank, and the external Inkbird thermostat (required for Keezers) will typically cost between $250 and $400 for a basic two-tap setup. If you opt for ultra-cheap chrome-plated brass faucets to save money, the acidic beer will eventually strip the plating, causing your beer to taste like pennies and ruining the entire investment. Always budget for 100% stainless steel forward-sealing faucets (like Perlick or Intertap) from day one.
The Quick Answer
A Beverage Cooler is the superior choice for traditional “open-air” dry aging because it features built-in circulation fans for mandatory airflow and precise digital thermostats. However, you must cover the glass door to prevent UV light from degrading the fat. A Mini Fridge is highly affordable and naturally blocks light, but it suffers from stagnant “dead air” and extreme temperature swings. It should only be used if you are utilizing moisture-permeable membranes (like UMAi Dry bags) and are willing to install aftermarket USB fans.
1. The Mini Fridge: The “Black Box” Approach
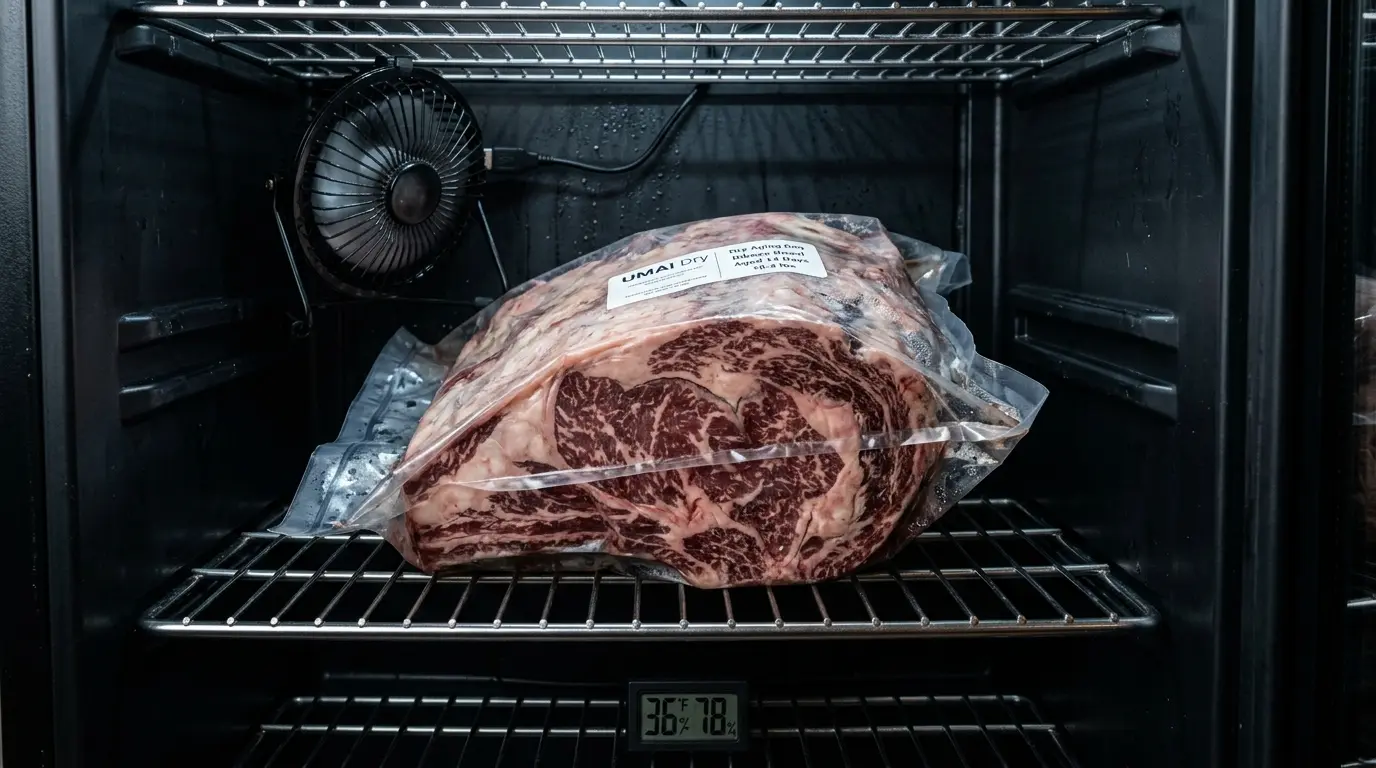
A standard compressor-based mini fridge (the kind you find in college dorm rooms) is the most affordable way to start dry aging at home. It is an incredibly popular choice for beginners, especially if you are using modern, moisture-permeable membranes like UMAi Dry bags that protect the meat from cross-contamination.
The Pros: UV Protection and Price
- Absolute Light Shielding: Beef fat is highly photosensitive. Prolonged exposure to ambient kitchen lighting or UV rays causes lipid oxidation, a chemical process that turns the beautiful white fat cap rancid and sour. Standard mini fridges have thick, solid metal doors that keep the interior pitch black 24/7, naturally protecting your expensive roast.
- Unbeatable Affordability: You can easily find a high-quality compressor mini fridge (either new or lightly used) for an absolute fraction of the cost of a dedicated, glass-front beverage center.
The Cons: The “Dead Air” Problem
Lack of internal airflow is the fatal flaw of the standard mini fridge. These appliances are engineered purely to keep things cold via passive radiant cooling, not to actively move air.
In order for a proper pellicle (the hard, protective, dry outer crust) to form on the surface of the meat quickly, you absolutely need constant, circulating airflow. In a standard mini fridge, the air is completely stagnant. Without airflow, the bottom and sides of the meat will stay wet, creating a perfect breeding ground for toxic, fuzzy green mold.
The Mandatory Fix: If you use a mini fridge, you cannot just put the meat on a shelf. You must install a small internal USB-powered PC fan to actively circulate air around the meat chamber. For a full breakdown on how to wire this, see our How to Set Up a DIY Dry Aging Fridge guide.
2. The Beverage Cooler: The Precision Choice
Beverage coolers (or beverage centers) are commercially designed to hold hundreds of cans of soda, craft beer, or wine. However, the advanced internal engineering required to chill beverages evenly makes them surprisingly adept, near-perfect machines for aging meat.
The Pros: Integrated Airflow and Digital Control
- Internal Forced-Air Fans: Almost all premium beverage coolers have integrated exhaust fans that run constantly to prevent “hot spots” from forming among dense glass bottles. This built-in circulation is a godsend for dry aging. It ensures even, rapid moisture evaporation from all 360 degrees of the beef, allowing the protective pellicle to form perfectly without requiring you to hack a USB fan into the wiring.
- Wire Racks: Unlike modern fridges that use solid glass shelves (which trap moisture), beverage coolers come standard with heavy-duty coated wire racks, providing the exact under-meat airflow required for curing.
- Digital Temperature Precision: Beverage coolers almost always feature external digital thermostats. Because they are designed to hold delicate wines or craft beers at exact serving temps, they allow you to lock in a specific, target temperature with much higher accuracy than a cheap mini fridge’s vague “1 to 7” mechanical dial.
The Cons: The Glass Door Dilemma
The beautiful, LED-illuminated glass door is a massive liability for long-term dry aging. As mentioned earlier, light destroys fat. Even if the manufacturer claims the glass is “UV-coated,” prolonged daily exposure to fluorescent kitchen lights or sunlight from a window will slowly degrade the meat’s lipid structure, causing rancidity. We cover this specific danger extensively in our Beverage Cooler vs Mini Fridge for Medication Storage safety guide.
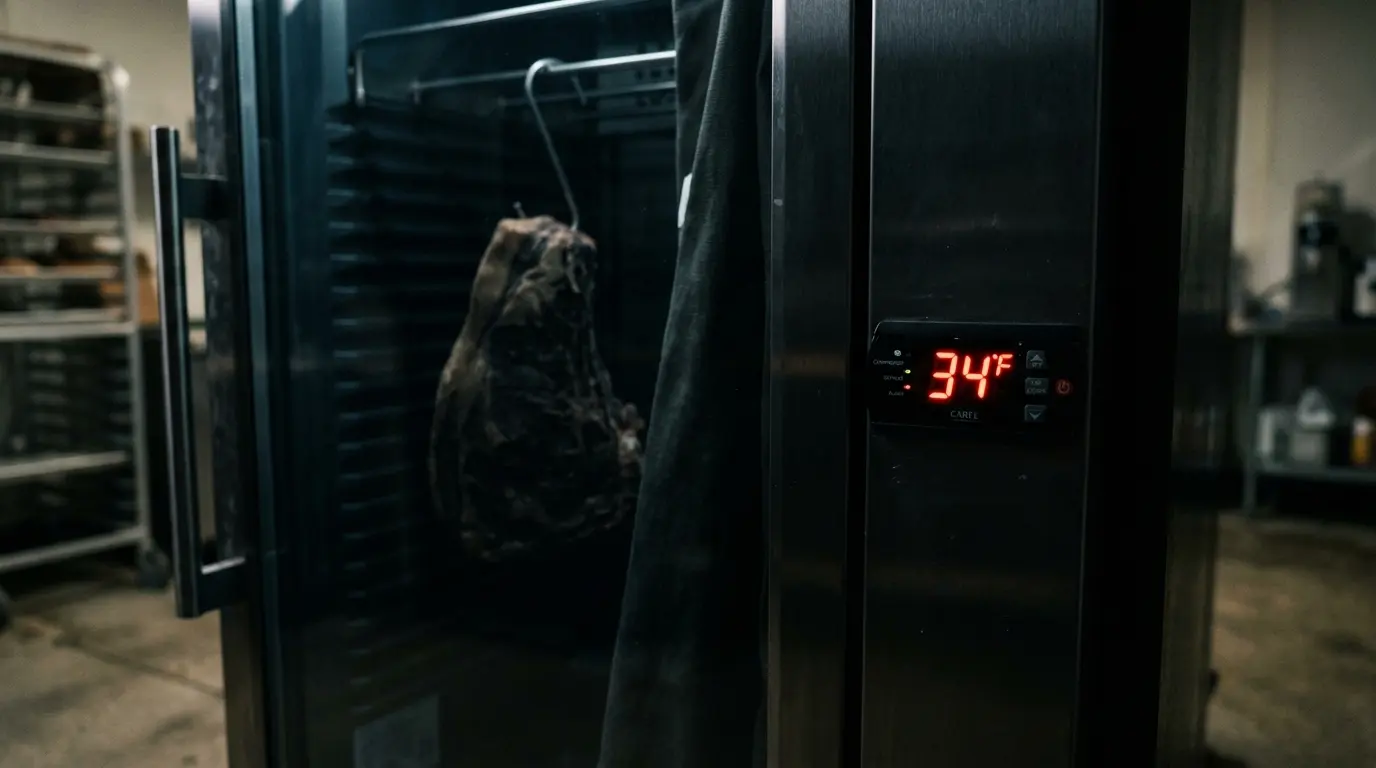
The Mandatory Fix: If you choose a beverage cooler, you must actively defeat the glass door. You should cover the exterior glass entirely with a piece of dark cardboard, or cleanly apply automotive 5% limo-tint film to the glass during the aging process to keep the meat in total, uninterrupted darkness.
3. The Critical Factor: Absolute Temperature Stability
Regardless of whether you choose the solid black box or the glass-front cooler, Temperature is King in the dry aging world. The biological process requires a hyper-narrow window of execution.
If the ambient air inside the fridge rises above 40°F (4°C) for a prolonged period, harmful spoilage bacteria (like E. coli and Salmonella) will rapidly multiply. You will have to throw the $200 roast directly into the trash.
If the fridge drops below 32°F (0°C), the internal moisture of the meat will freeze into ice crystals. This halts the enzymatic aging process entirely. The meat will essentially sit in suspended animation, completely failing to tenderize or develop flavor.
The Sweet Spot: You must maintain a steady 34°F to 38°F.
Because beverage coolers are often designed for slightly higher temperatures (like storing red wine at 55°F), you must verify that the specific model you are buying can actually compress down to a steady 34°F. While standard mini fridges can easily reach these lower, near-freezing temperatures, their cheap mechanical thermostats often “swing” wildly (dropping to 30°F, then rising to 42°F before kicking back on).
The Pro-Level Override
To guarantee your meat never rots or freezes, the safest method is to completely bypass the internal thermostat of the appliance using a commercial-grade external relay.
By plugging your fridge into a digital temperature controller, you gain laboratory-level precision over the compressor cycle. Read exactly how to wire this failsafe system in our Inkbird ITC-308 Mini Fridge Setup guide.
Explore the Refrigerator Hub
Don’t stop here! Dive deeper into appliance mechanics and discover the best DIY setups tailored specifically for culinary projects, home brewing, and kitchen upgrades.
FAQ: DIY Dry Aging at Home
2026 Masterclass: Tenderness, Flavor & Food Safety
Butcher’s Tip: Use a small computer fan inside your aging fridge to ensure constant airflow—this is the best way to prevent bad mold and ensure an even pellicle!
