
Mini Fridge vs Chest Freezer for Kegerator Conversion: Which is Better? (2026)
For dedicated homebrewers and craft beer enthusiasts, meticulously cleaning 50 individual glass bottles and capping them by hand for a single batch of beer is a tedious, universally despised, time-consuming chore. The ultimate, life-changing upgrade for any home bar is building a custom draft system to serve perfectly chilled, carbonated beer straight from the tap.
When you decide to roll up your sleeves and build your own DIY system rather than spending thousands of dollars on a pre-built commercial unit, you are immediately faced with the biggest, most hotly contested debate in the homebrewing community: Mini Fridge vs Chest Freezer.
Converting a mini fridge creates a classic “Kegerator,” while converting a chest freezer creates a massive unit what the community affectionately calls a “Keezer.” Both appliances successfully keep your beer cold, but their spatial footprints, keg capacities, and the permanent, invasive DIY modifications required to build them are entirely different. In this definitive guide, we break down the pros, cons, and harsh construction realities of both options to help you choose the ultimate foundation for your dream draft system.
The Quick Answer
A Mini Fridge Kegerator is best for tight spaces and home offices. It fits neatly under a counter and allows you to easily slide heavy kegs inside through the front door, but it only holds 1 or 2 kegs and carries a high risk of accidentally drilling into a hidden freon line during construction. A Chest Freezer (Keezer) is the ultimate choice for serious brewers. It can hold 4 to 8+ kegs and is modified safely using a wooden collar (zero drilling into the appliance). However, it requires a massive floor footprint and forces you to deadlift 50-pound kegs over your chest to load them.
1. The Mini Fridge Kegerator: The Classic Front-Loader
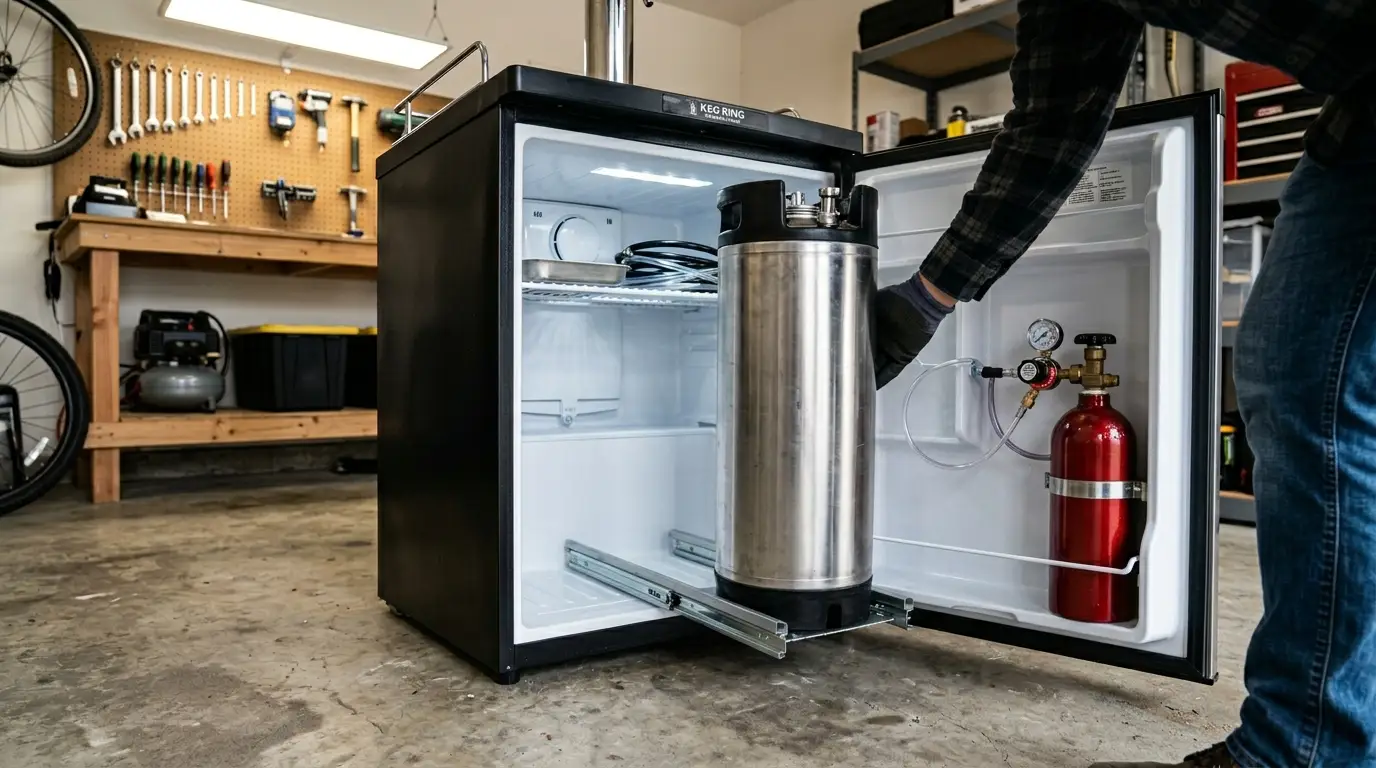
A mini fridge kegerator is exactly what you typically see in commercial bars or high-end residential man caves: it is a standard, front-opening refrigerator with either a shiny chrome draft tower mounted directly on top of it, or a series of metal tap faucets drilled straight through the front swinging door.
The Pros: Ergonomics and Footprint
- Front-Loading Convenience (The Back Saver): This is the absolute biggest, undisputed advantage of the front-loading fridge. A full 5-gallon Corny (Cornelius) keg weighs just over 50 pounds (23 kg). With a mini fridge, you simply open the front door and gently slide the heavy metal keg inside along the floor. There is absolutely no heavy lifting, no awkward bending, and no straining your lower back.
- Compact, Vertical Footprint: Mini fridges are architecturally designed to slide perfectly under standard 36-inch kitchen counters or fit neatly into a tight, unused corner of your living room or home office. They have a narrow, vertical footprint that saves highly valuable floor space, making them ideal for apartment dwellers.
The Cons: Limited Space and Dangerous Modifications
- Critically Low Capacity: Even if you buy the absolute largest mini fridge on the market (usually around 4.4 cubic feet) and spend hours carefully cutting the molded plastic shelving out of the inner door with a Dremel tool to create more depth, you will generally only be able to physically squeeze a maximum of two 5-gallon kegs inside, alongside a small 5lb CO2 gas tank. For many brewers, a two-tap limit is incredibly frustrating.
The Drilling Danger (Freon Roulette)
To convert a mini fridge into a functional draft system, you must physically drill a 3-inch hole straight through the top ceiling of the unit (for a tower) or drill through the front door (for shank faucets) to route your vinyl beer lines.
As we warned heavily in our related DIY modification guide, modern appliances use “skin condensers.” This means the side walls and top ceiling of these fridges are densely packed with invisible, high-pressure liquid coolant lines hidden beneath the plastic. If the sharp teeth of your hole saw nick a freon line by even a millimeter, the highly pressurized gas will aggressively hiss out, and the fridge is instantly, permanently destroyed before you even pour your first pint. You absolutely must read our safety manual on How to Find Coolant Lines in a Mini Fridge Before Drilling to map the safe zones first.
2. The Chest Freezer “Keezer”: The High-Capacity Beast
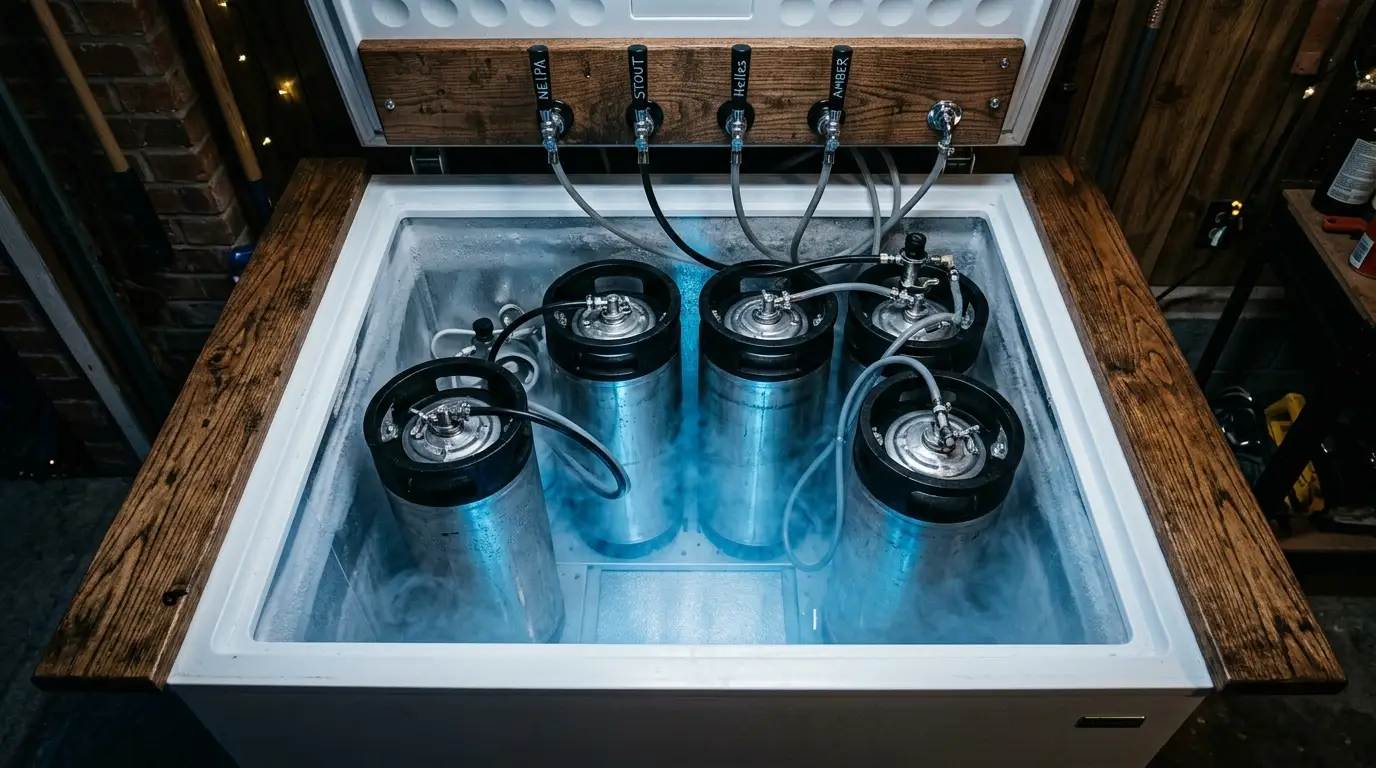
A “Keezer” takes a standard, top-loading deep chest freezer and converts it entirely into a massive draft cooler.
There is one major electrical hurdle you must address immediately: Freezers are naturally designed to run well below freezing (0°F), which will instantly freeze your kegs solid, bursting the stainless steel seams and ruining 5 gallons of beer. To safely use a freezer for beer, you must bypass its internal thermostat entirely. You plug the freezer’s power cord directly into an external digital thermostat override controller, exactly like the one detailed in our Inkbird ITC-308 Setup Guide. The Inkbird cuts the power to the freezer precisely to keep it at a perfect, unwavering 38°F (3°C) serving temperature.
The Pros: Massive Storage and Safe Modifications
- Incredible Unmatched Capacity: If you love variety, this is your only real choice. A standard, compact 7-cubic-foot chest freezer can easily swallow three to four 5-gallon kegs plus a massive 20lb CO2 tank. A larger 14-cubic-foot model can hold eight or more kegs. If you like the luxury of having a crisp pale ale, a dark stout, a hard cider, and a keg of sparkling water on tap simultaneously, the keezer reigns supreme.
- Thermodynamic Energy Efficiency: The laws of physics dictate that cold air is heavier than warm air; it sinks. Every single time you swing open the front door of a mini fridge kegerator, 100% of the cold air falls out onto your floor, forcing the compressor to work in overdrive to cool the unit back down. When you open the top lid of a chest freezer, the heavy cold air stays perfectly trapped inside the deep tub, making it highly energy efficient and incredibly stable.
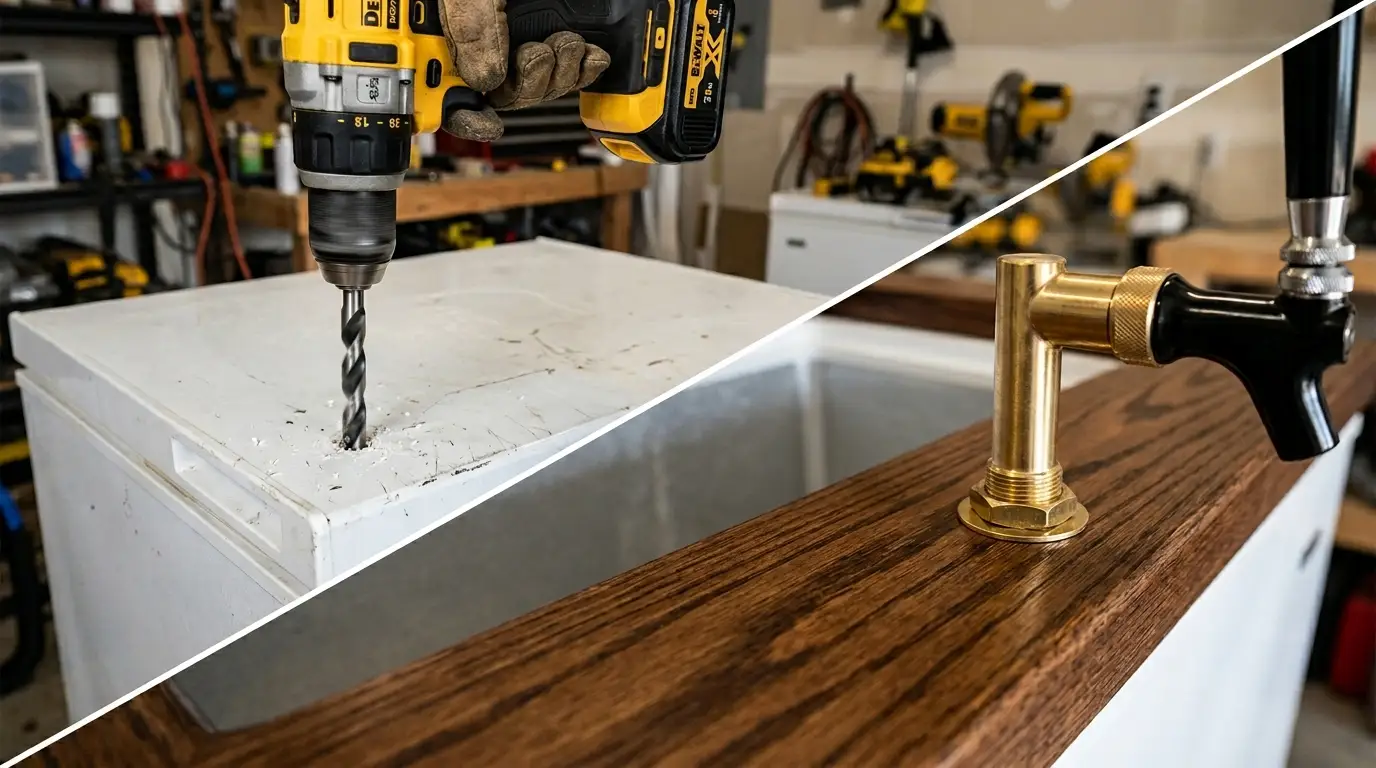
The “Collar” Build (Zero Destruction)
This is the absolute best part of building a keezer: You never have to drill a single hole into the metal walls of the appliance.
Instead of risking freon lines, homebrewers simply unbolt the lid from its hinges. They then build a simple, rectangular wooden frame (called a “collar,” usually made of 2×6 or 2×8 lumber) that sits perfectly sandwiched between the top lip of the freezer base and the lid. You drill all of your messy tap holes safely through this sacrificial wooden collar, completely eliminating the risk of destroying the appliance. As a bonus, the 8-inch collar actually adds vertical height to the freezer, allowing you to fit even taller commercial kegs inside.
The Cons: The Back-Breaking Lift
- Top-Loading Struggle: Because a chest freezer loads exclusively from the top, you cannot slide anything. You have to physically bend over, grab a wet, 50-pound stainless steel keg, and deadlift it up and over the 3-foot high lip of the freezer to drop it down into the deep tub. If you have any lower back issues, shoulder injuries, or lack upper body strength, this is a major, undeniable dealbreaker.
- Severe Moisture Management: Unlike modern refrigerators, deep chest freezers do not have built-in auto-defrost or dehumidification features. Because you are artificially holding it at 38°F instead of 0°F, ambient humidity will rapidly condense into water and pool constantly at the bottom of the tub. If left unchecked, this stagnant water will breed massive amounts of black mold on your rubber keg lines. You will need to actively use passive renewable dehumidifiers (like Eva-Dry silica units) and wipe the bottom with bleach constantly to prevent mold growth.
3. Direct Comparison: Kegerator vs. Keezer
Before you make a trip to the appliance store, review this side-by-side comparison of the two builds to see which fits your specific lifestyle and carpentry skills.
| Feature | Mini Fridge (Kegerator) | Chest Freezer (Keezer) |
|---|---|---|
| Max Keg Capacity | Low (1 to 2 Kegs) | High (3 to 8+ Kegs) |
| Ergonomics (Loading) | Excellent (Slide in easily) | Poor (Heavy lifting over the lip) |
| Risk of Destroying Appliance | High (Drilling through coolant lines) | Zero (Using a wooden collar) |
| Footprint / Space Needed | Vertical / Compact | Wide / Requires massive floor space |
| External Controller Needed? | No (Usually plug-and-play) | Yes (Requires Inkbird ITC-308) |
Explore the Refrigerator Hub
Don’t stop here! Dive deeper into appliance mechanics and discover the best DIY setups tailored specifically for custom culinary projects, dry aging, and home brewing.
FAQ: DIY Draft Systems
2026 Guide: Keezers, Kegerators, and Precise Temp Control
Draft Tip: If your beer is too foamy, check your serving pressure. Most home setups pour perfectly at 10-12 PSI with 6 feet of 3/16″ beer line!
