
How to Find Coolant Lines in a Mini Fridge Before Drilling (2026 DIY Guide)
Modifying a mini fridge is an absolute rite of passage for dedicated DIY enthusiasts. Whether you are building a custom home draft system (a project we detail in our Mini Fridge vs Chest Freezer for Kegerator Conversion guide), setting up a temperature-controlled fermentation chamber, or installing a custom lockbox for secure medication storage, you are eventually going to need to drill a massive hole straight through the appliance wall.
However, hidden just millimeters beneath the thin plastic interior and the painted metal exterior of your fridge is a dense, invisible maze of high-pressure copper or aluminum tubing. These are the delicate coolant (Freon) lines that keep the appliance running.
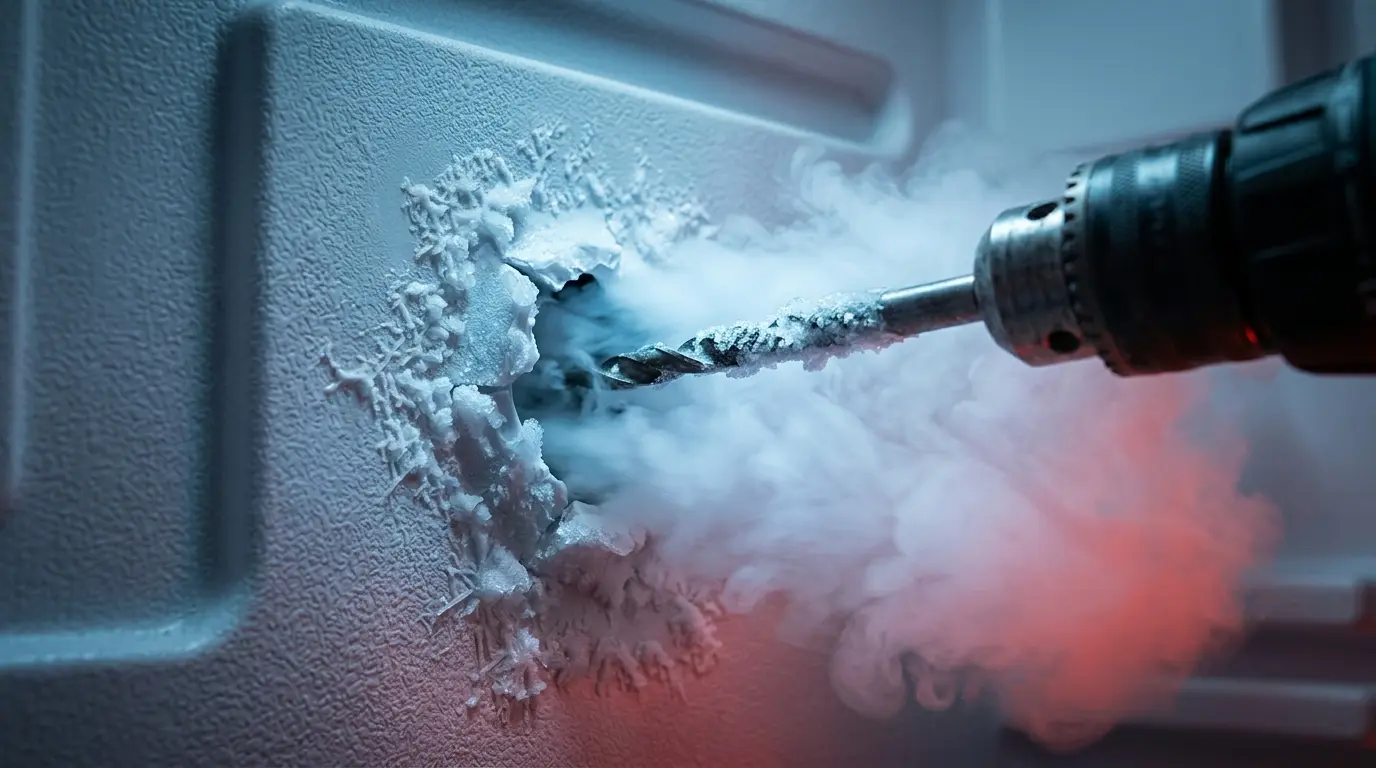
If the sharp teeth of your hole saw or drill bit nick even a fraction of a millimeter into one of these lines, you will hear a sudden, catastrophic hissing sound. In seconds, all the vital refrigerant will escape, and your appliance will be permanently destroyed. Before you pick up your power tools, you need a fail-safe strategy. In this master guide, we break down exactly how to find coolant lines in a mini fridge using simple household chemistry and modern tech tools so you can drill with absolute confidence.
The Quick Answer
Never drill blindly into a mini fridge. To locate hidden coolant lines, mix a thin paste of cornstarch and high-percentage rubbing alcohol and paint it over the target drilling area. Turn the unplugged fridge on to maximum power. The heat from the hidden condenser lines will cause the alcohol to evaporate rapidly, leaving a dry, white, powdery map of the pipes on the surface of the fridge. For absolute safety, you must also use the “Probe and Peel” method: cut only through the inner plastic, dig out the foam insulation by hand, and visually confirm the void is clear of metal pipes before drilling through the outer steel shell.
I. The Anatomy: Where Are Coolant Lines Usually Located?
Before we start mixing chemicals, it helps to understand why these lines are hidden in the first place. In older, full-sized refrigerators, the condenser coils (the pipes that exhaust heat) were bolted to the outside back wall in a large, dusty grid.
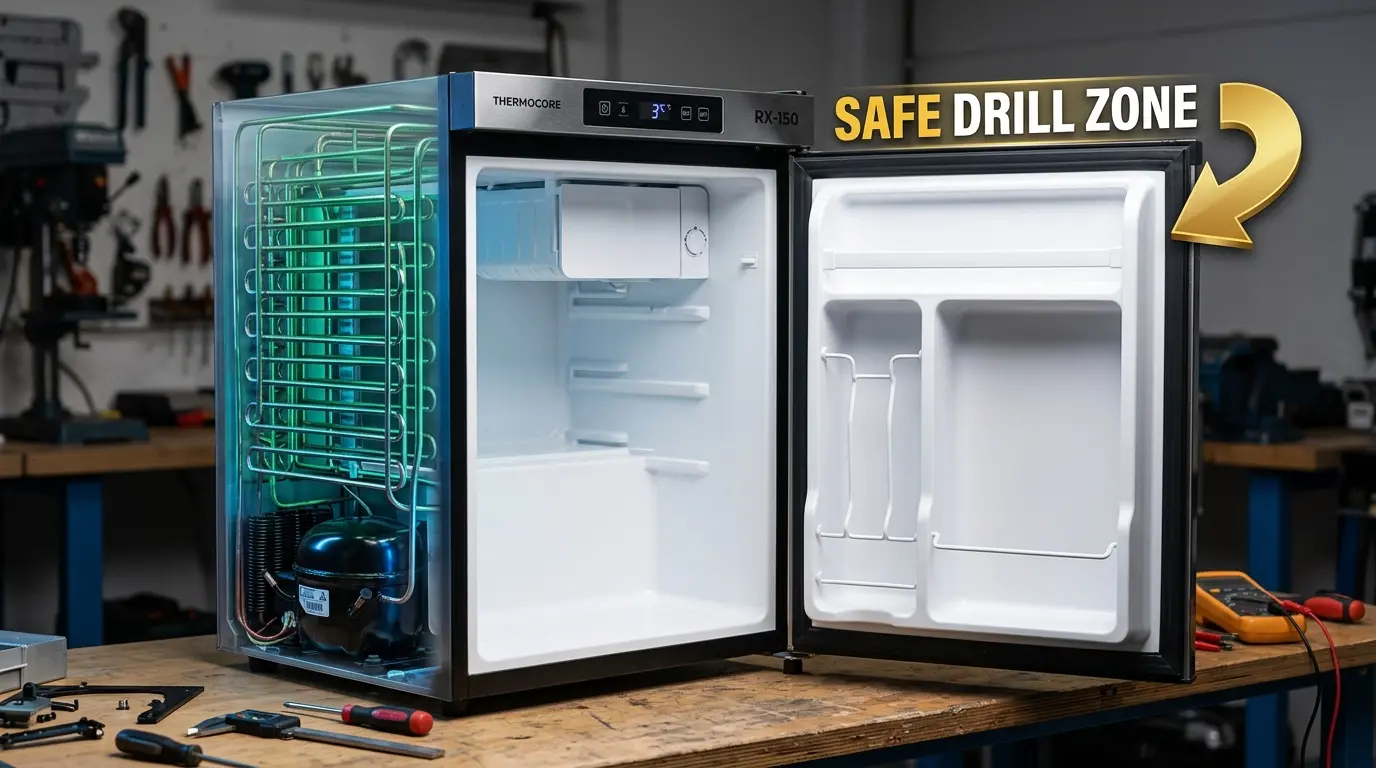
To make modern mini fridges look sleek and fit tightly into dorm rooms, manufacturers now use “Skin Condensers.” They route the high-pressure, hot coolant lines directly against the inner walls of the outer metal cabinet, completely burying them in polyurethane spray foam. While every manufacturer is different, understanding the general anatomy can help you significantly narrow down the safe zones.
If your mini fridge has a small freezer compartment or a chilling tray at the very top, the ceiling panel is incredibly dangerous. The main evaporator cooling plate is often integrated directly into the plastic molding. Drilling a draft tower through the top requires extreme precision.
Modern compressor mini fridges frequently route their hot condenser coils in a zig-zag pattern through the left and right outer side panels to dissipate heat. If the sides of your fridge feel warm to the touch while it is running, there are pipes behind that metal.
The swinging door is almost always the absolute safest place to drill. Unless your premium fridge has an integrated digital touch screen or an ice dispenser in the door, the entire slab is completely hollow and filled only with inert foam insulation.
Wait, what about Thermoelectric Fridges?
If you are trying to modify a solid-state beauty fridge or an ultra-quiet bedroom desk cooler, the rules are entirely different. They do not use Freon pipes at all. Read our Thermoelectric vs Compressor Mini Fridge guide to understand how solid-state Peltier cooling mechanisms are built before you accidentally drill directly into the internal electronic exhaust fan.
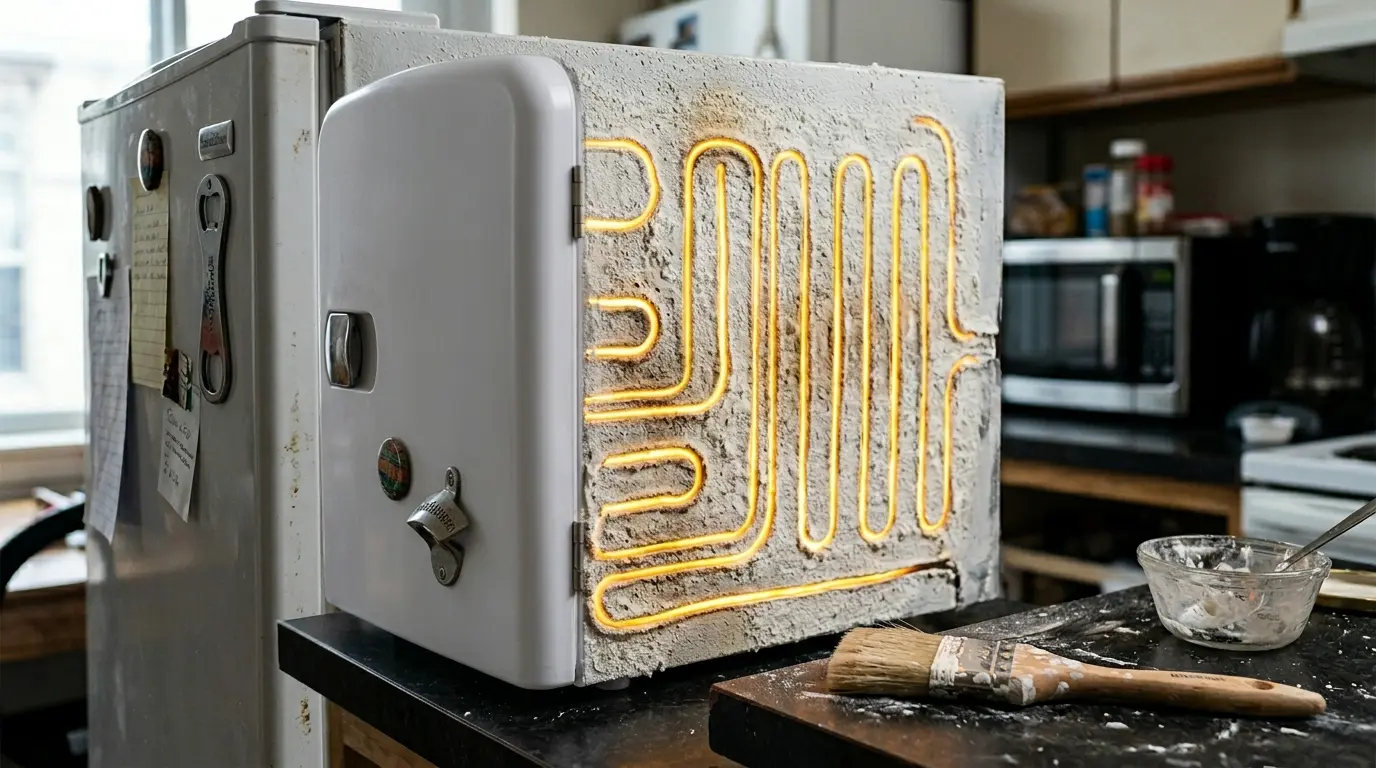
II. The Cornstarch and Alcohol Method (The Visual Trick)

This is the most trusted, foolproof method used by veteran homebrewers, HVAC techs, and DIY kegerator builders for decades. It relies entirely on basic thermodynamics: when a compressor turns on, the hidden coolant lines immediately begin to generate intense localized heat (on the outside walls) or extreme cold (on the inside walls).
What You Need:
- Cornstarch: Standard kitchen cornstarch works best, but baby powder or baking soda can work in a pinch.
- Rubbing Alcohol: 91% or 99% Isopropyl alcohol is highly recommended. The higher the percentage, the faster it evaporates, making the map much clearer.
- A cheap paintbrush or a wide foam craft brush.
- A permanent marker (Sharpie).
The Step-by-Step Process:
- Unplug and Warm Up: Ensure your mini fridge is completely unplugged and has been sitting with the door open at ambient room temperature for at least 4 to 6 hours. The entire metal cabinet must be a uniform, neutral temperature for this to work.
- Mix the Paste: In a small glass bowl, mix equal parts cornstarch and rubbing alcohol. Stir it until you have a thin, translucent, paintable paste (similar to the consistency of skim milk).
- Paint the Target Area: Apply a thin, even layer of this wet paste over the entire general area where you intend to drill (e.g., the top of the fridge for a beer draft tower, or the outer side wall to run a CO2 gas line).
- Turn the Fridge On: Immediately plug the fridge into the wall outlet and crank the internal thermostat dial to the absolute coldest maximum setting to force the compressor into overdrive.
- Watch the Magic Happen: Do not blink. Because highly concentrated rubbing alcohol evaporates incredibly fast when exposed to sudden temperature changes, the paste will begin to dry unevenly. As the hidden, winding coolant lines heat up or cool down, the wet paste located directly above them will dry exponentially faster than the rest of the surface.
- Map It Out: Within 5 to 10 minutes, you will see a perfect, powdery, stark-white map of the internal coils emerge from the wet, translucent paste. Quickly outline these dry lines with a permanent marker, and you now know exactly where not to drill!
III. Using an Infrared Thermometer (The Tech Approach)
If you don’t want to make a powdery mess in your garage with cornstarch, using an infrared (IR) laser thermometer or a smartphone-compatible thermal imaging camera (like a FLIR One) is a brilliant, non-destructive alternative.
How to Execute the Scan:
- Just like the previous method, let the fridge sit unplugged until the metal chassis reaches a totally neutral ambient room temperature.
- Plug the appliance in and turn the thermostat to maximum power.
- Immediately grab your IR thermometer gun. Hold it about two inches away from the metal surface and slowly scan the target area in a tight grid pattern.
- The areas containing the hot, high-pressure condenser coils will register a sudden, sharp spike in heat (often jumping 10°F to 20°F higher than the surrounding metal). Record these hot spots with a marker.
IV. The “Probe and Peel” Drilling Technique
This is the most critical section of this guide. Even if you have mapped out the lines perfectly using thermal cameras and cornstarch, you should never blindly drive a drill bit or a hole saw straight through the thick wall.
Thermal mapping is not an exact science; a line could easily be offset by half an inch. To guarantee you do not destroy your appliance, you must use the physical “Probe and Peel” safety method.
- Score the Plastic (Go in Reverse): From the inside of the fridge, place your hole saw drill bit against the thin inner plastic lining. Run the drill in reverse. This will gently score and cut through the brittle plastic without the sharp teeth violently biting, plunging, and ripping into the unknown foam beneath.
- Remove the Foam: Once the plastic disc is safely removed, put the power tools down. Use a blunt, plastic pry tool, a wooden chopstick, or your thumbs to gently, slowly dig out the rigid polyurethane insulation foam chunk by chunk. Do not use a sharp metal screwdriver for this step.
- Inspect the Void: Clear the foam all the way down until you reach the inner side of the outer metal shell. Shine a bright flashlight inside the freshly dug hole. If you see a silver or copper pipe running through the void, stop immediately! You have found a line. You must abort the hole and patch the insulation.
- Drill the Metal: If the void is completely clear of all pipes, structural wires, and thermostat sensors, you are officially safe to proceed. Take your drill and punch through the outer metal shell from the inside out.
V. What Happens If You Hit a Freon Line?
If you get impatient, push a drill bit too deep, and puncture a line, you will immediately hear a terrifying, high-pressure hissing noise. The appliance is officially dead. But more importantly, it is a severe safety hazard.
- 🔥 Flammability Warning: Older fridges used inert R-134a, but almost all modern, high-efficiency mini fridges manufactured today use R-600a (Isobutane) as the primary refrigerant. Isobutane is highly flammable. If you puncture a line while your electric drill motor is throwing sparks, you can technically trigger a flash fire. Unplug the drill immediately and ventilate the room.
- 💸 Can it be fixed? Technically, yes. A certified HVAC technician could cut open the cabinet, braze the micro-hole with a torch, pull a vacuum on the system, and recharge the exact weight of refrigerant. However, the specialized labor cost for this will easily exceed $300, which is far more than the price of simply buying a brand-new mini fridge.
- 💧 The Drainage Exception: If your drill accidentally caused an internal crack in the soft plastic condensation drainage line located at the rear bottom of the fridge (rather than a pressurized metal Freon pipe), you will not hear a hiss, but you will soon notice a mysterious puddle on your floor. If this happens, you can actually save the fridge by following our repair manual on How to Fix a Refrigerator That Is Leaking Water Inside.
Explore More Appliance Hacks
Don’t stop here! Visit our complete hub for more expert DIY tips, step-by-step installation guides, and updated buying recommendations for 2026.
FAQ: Drilling and Modifying Mini Fridges
2026 Guide: Safety, Kegerator Conversions & Troubleshooting
DIY Safety Tip: Never assume where the coolant lines are. Always use the cornstarch and alcohol trick to map out the heat map before your drill bit touches metal!
